This section describes two common end-to-end flows for working with the Travel Rule API. Each flow is broken down into clear, actionable steps explaining what to do and what you get as a result.
This flow demonstrates how a single VASP user can authenticate, generate a Travel Address, create a transfer, and then locate it in the Transfer Inbox.
Step 1. Register in the Travel Rule System Register a new user account in the Travel Rule application.
👉 Go to: Dashboard
Result: You will have an active user account with access to the dashboard.
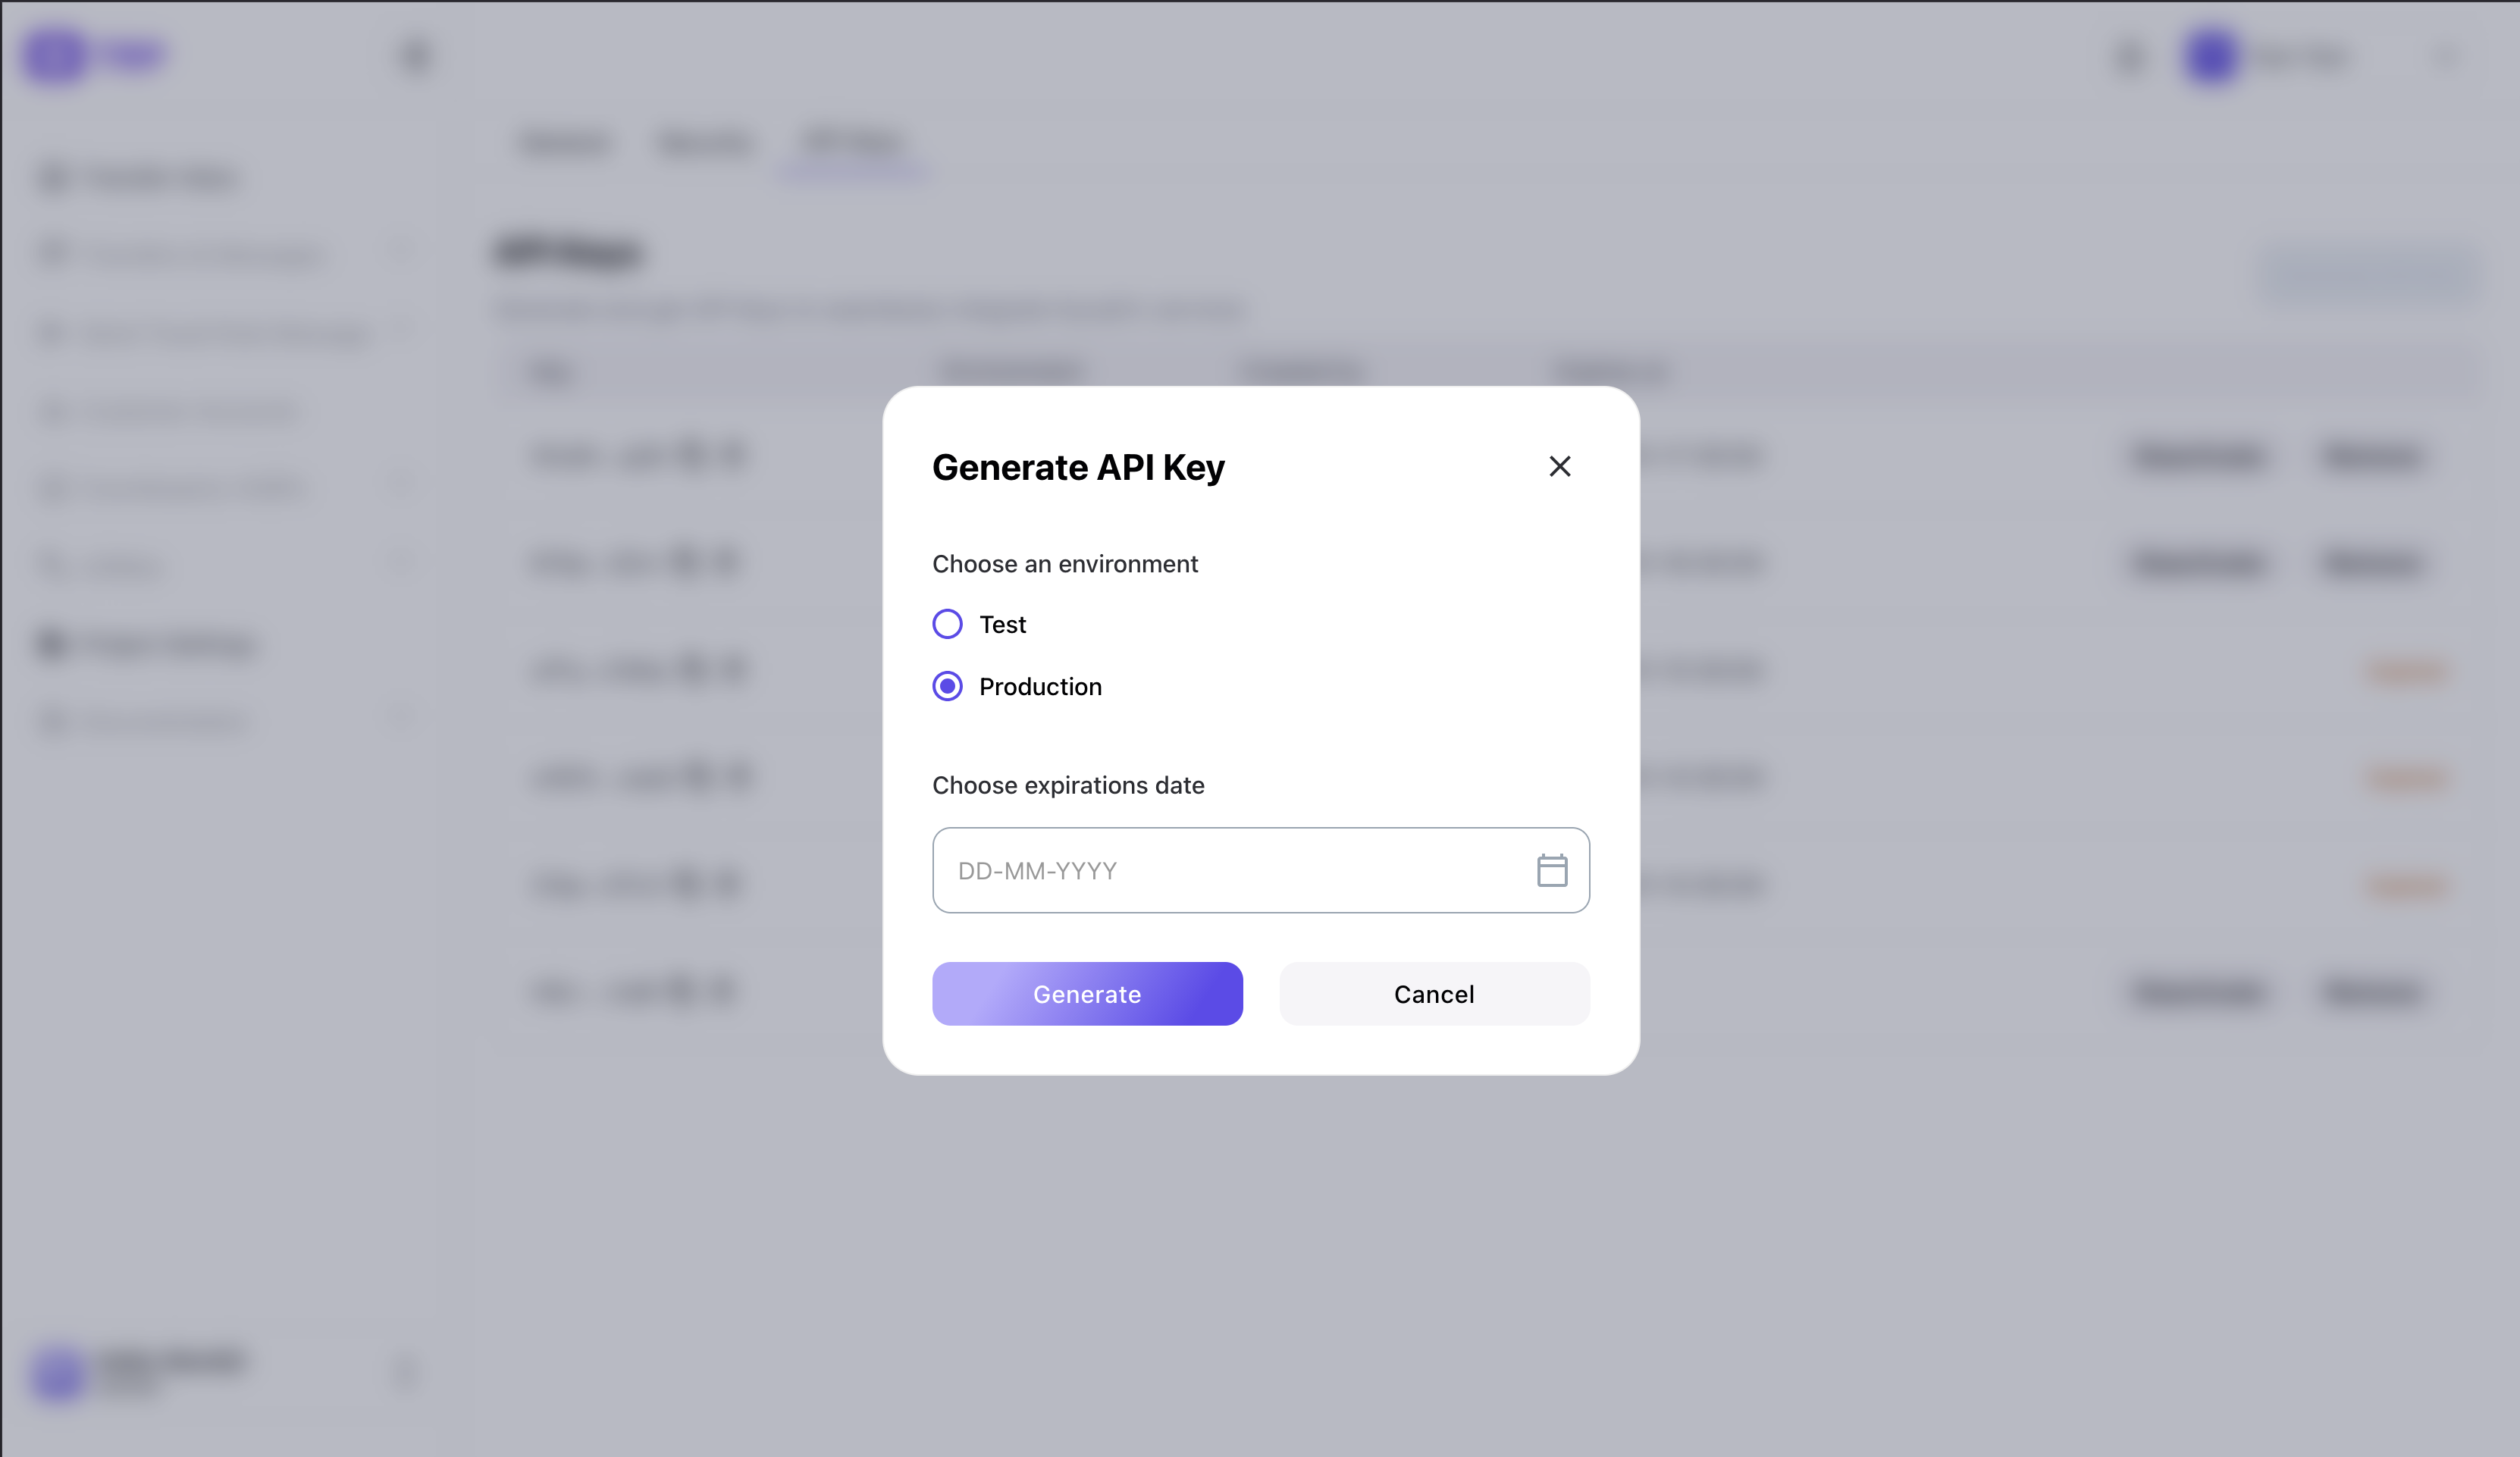
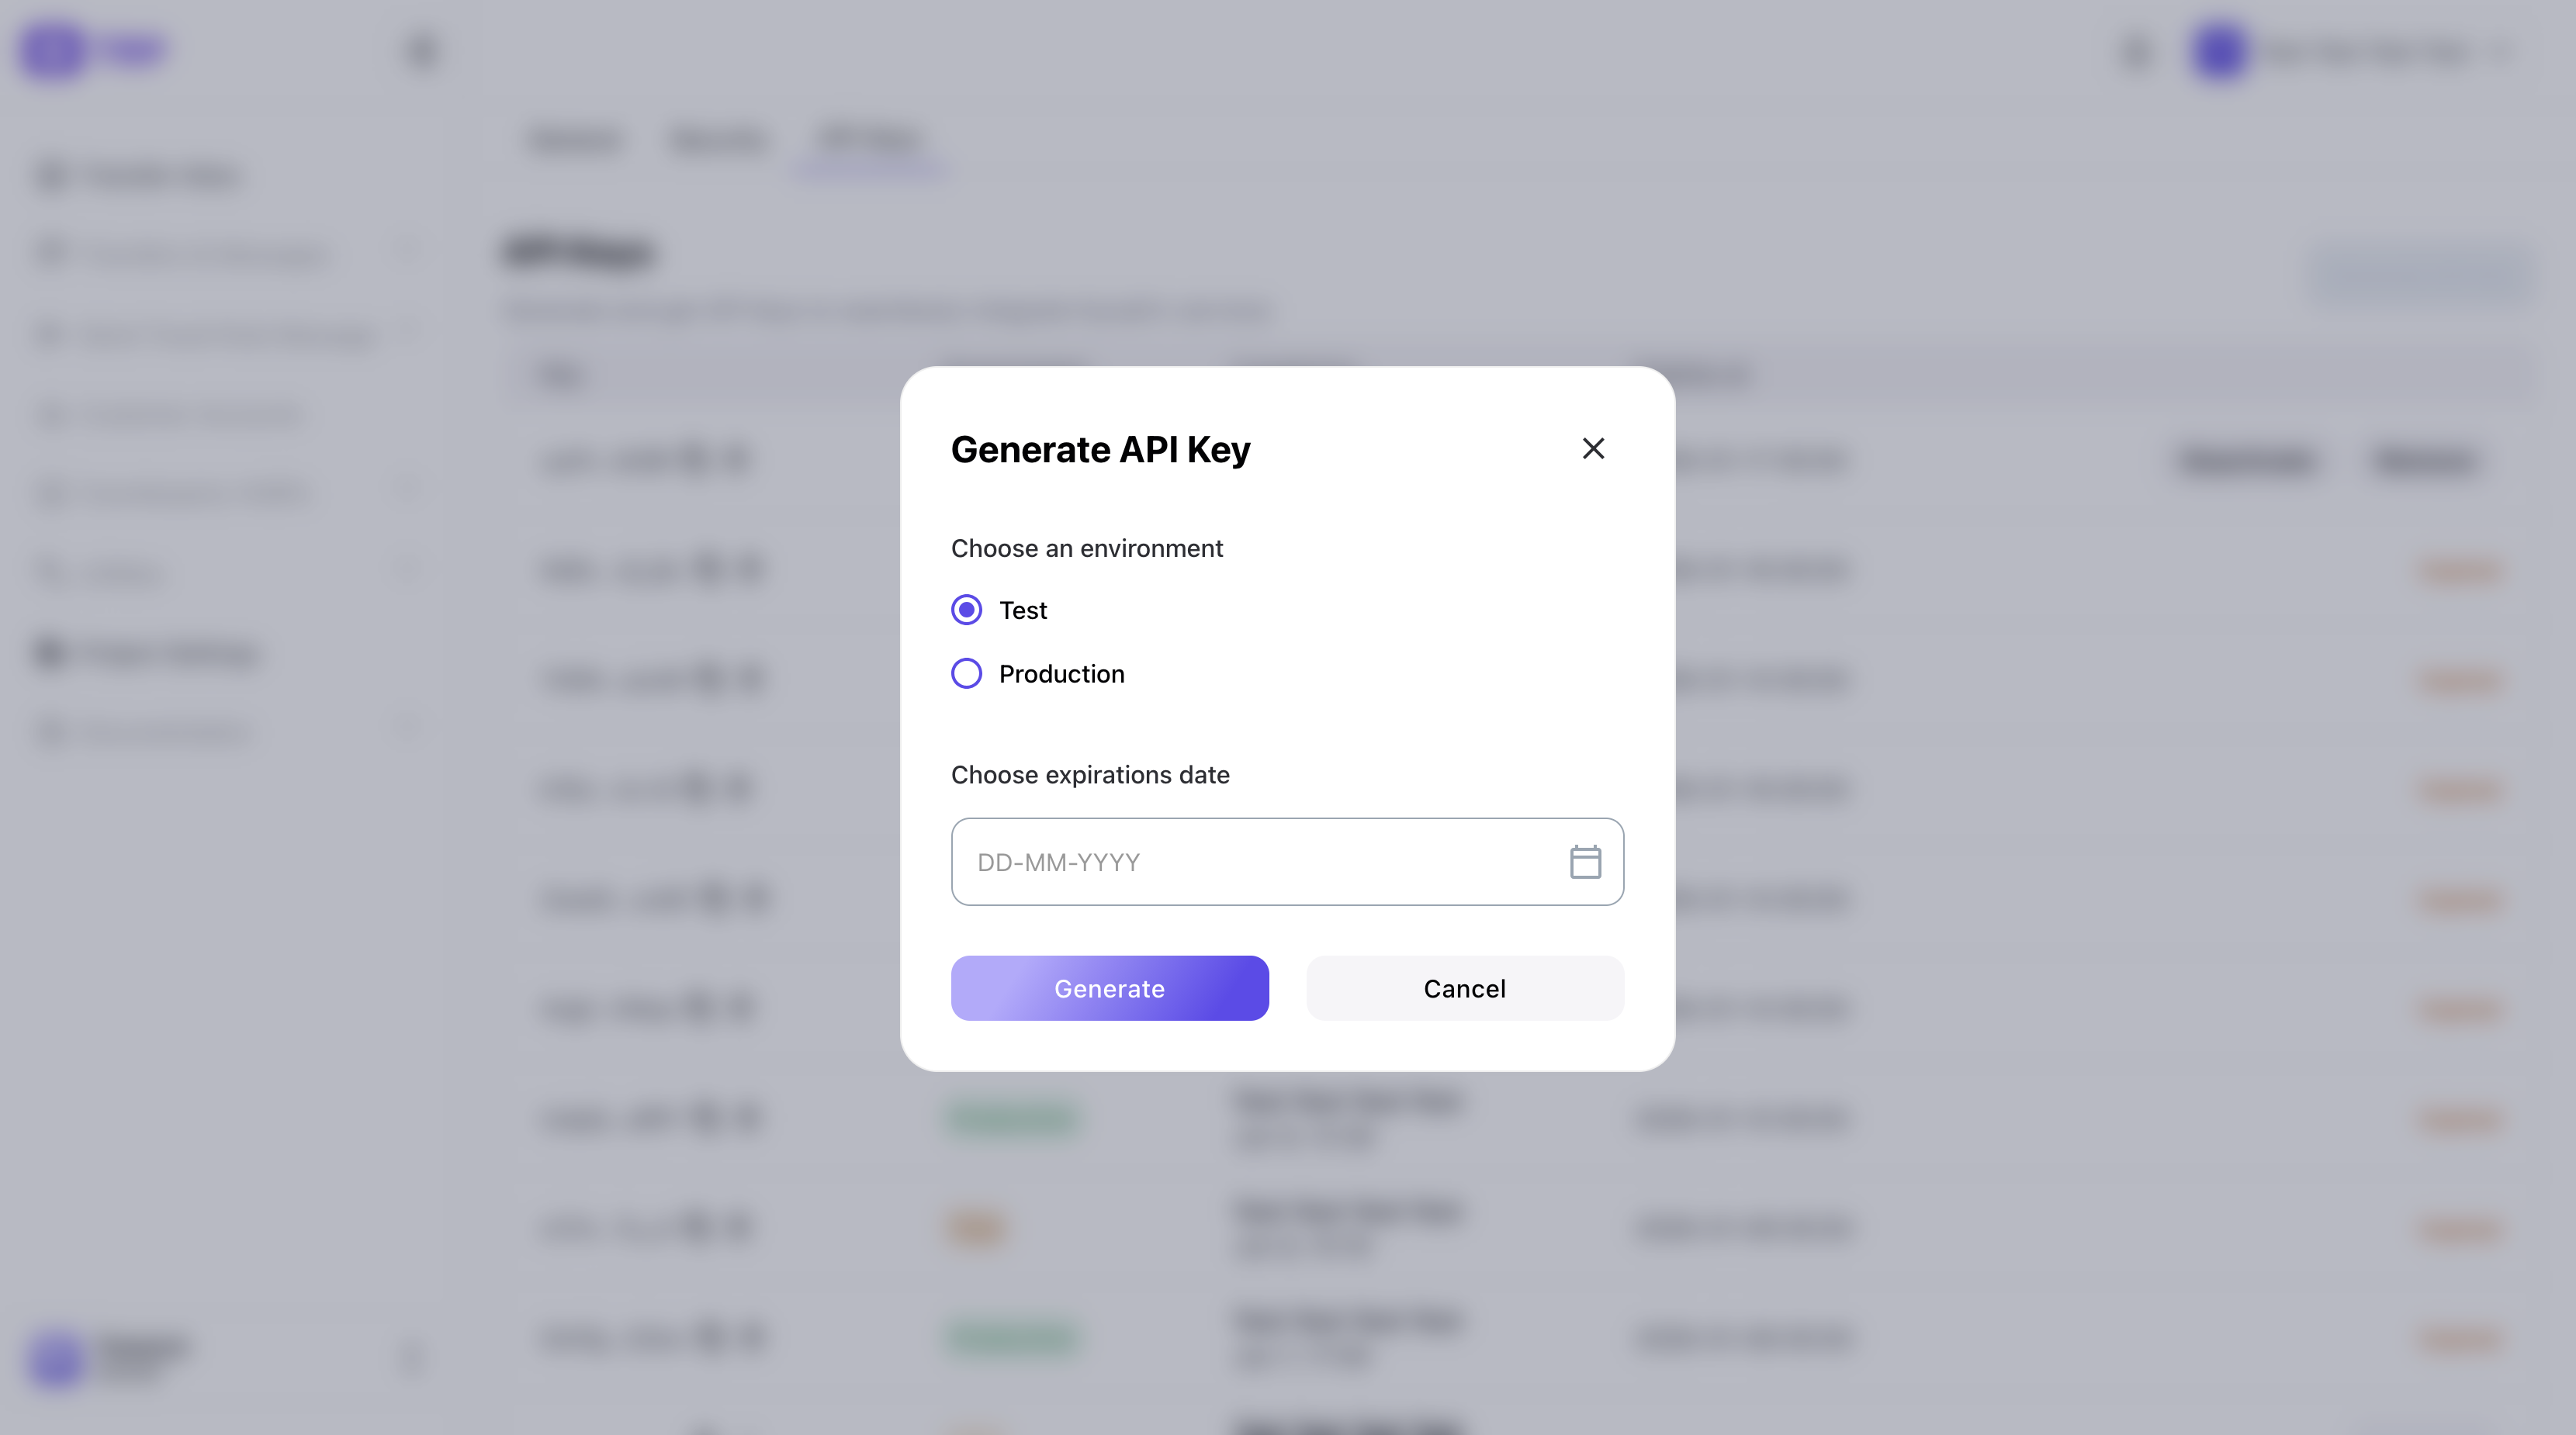
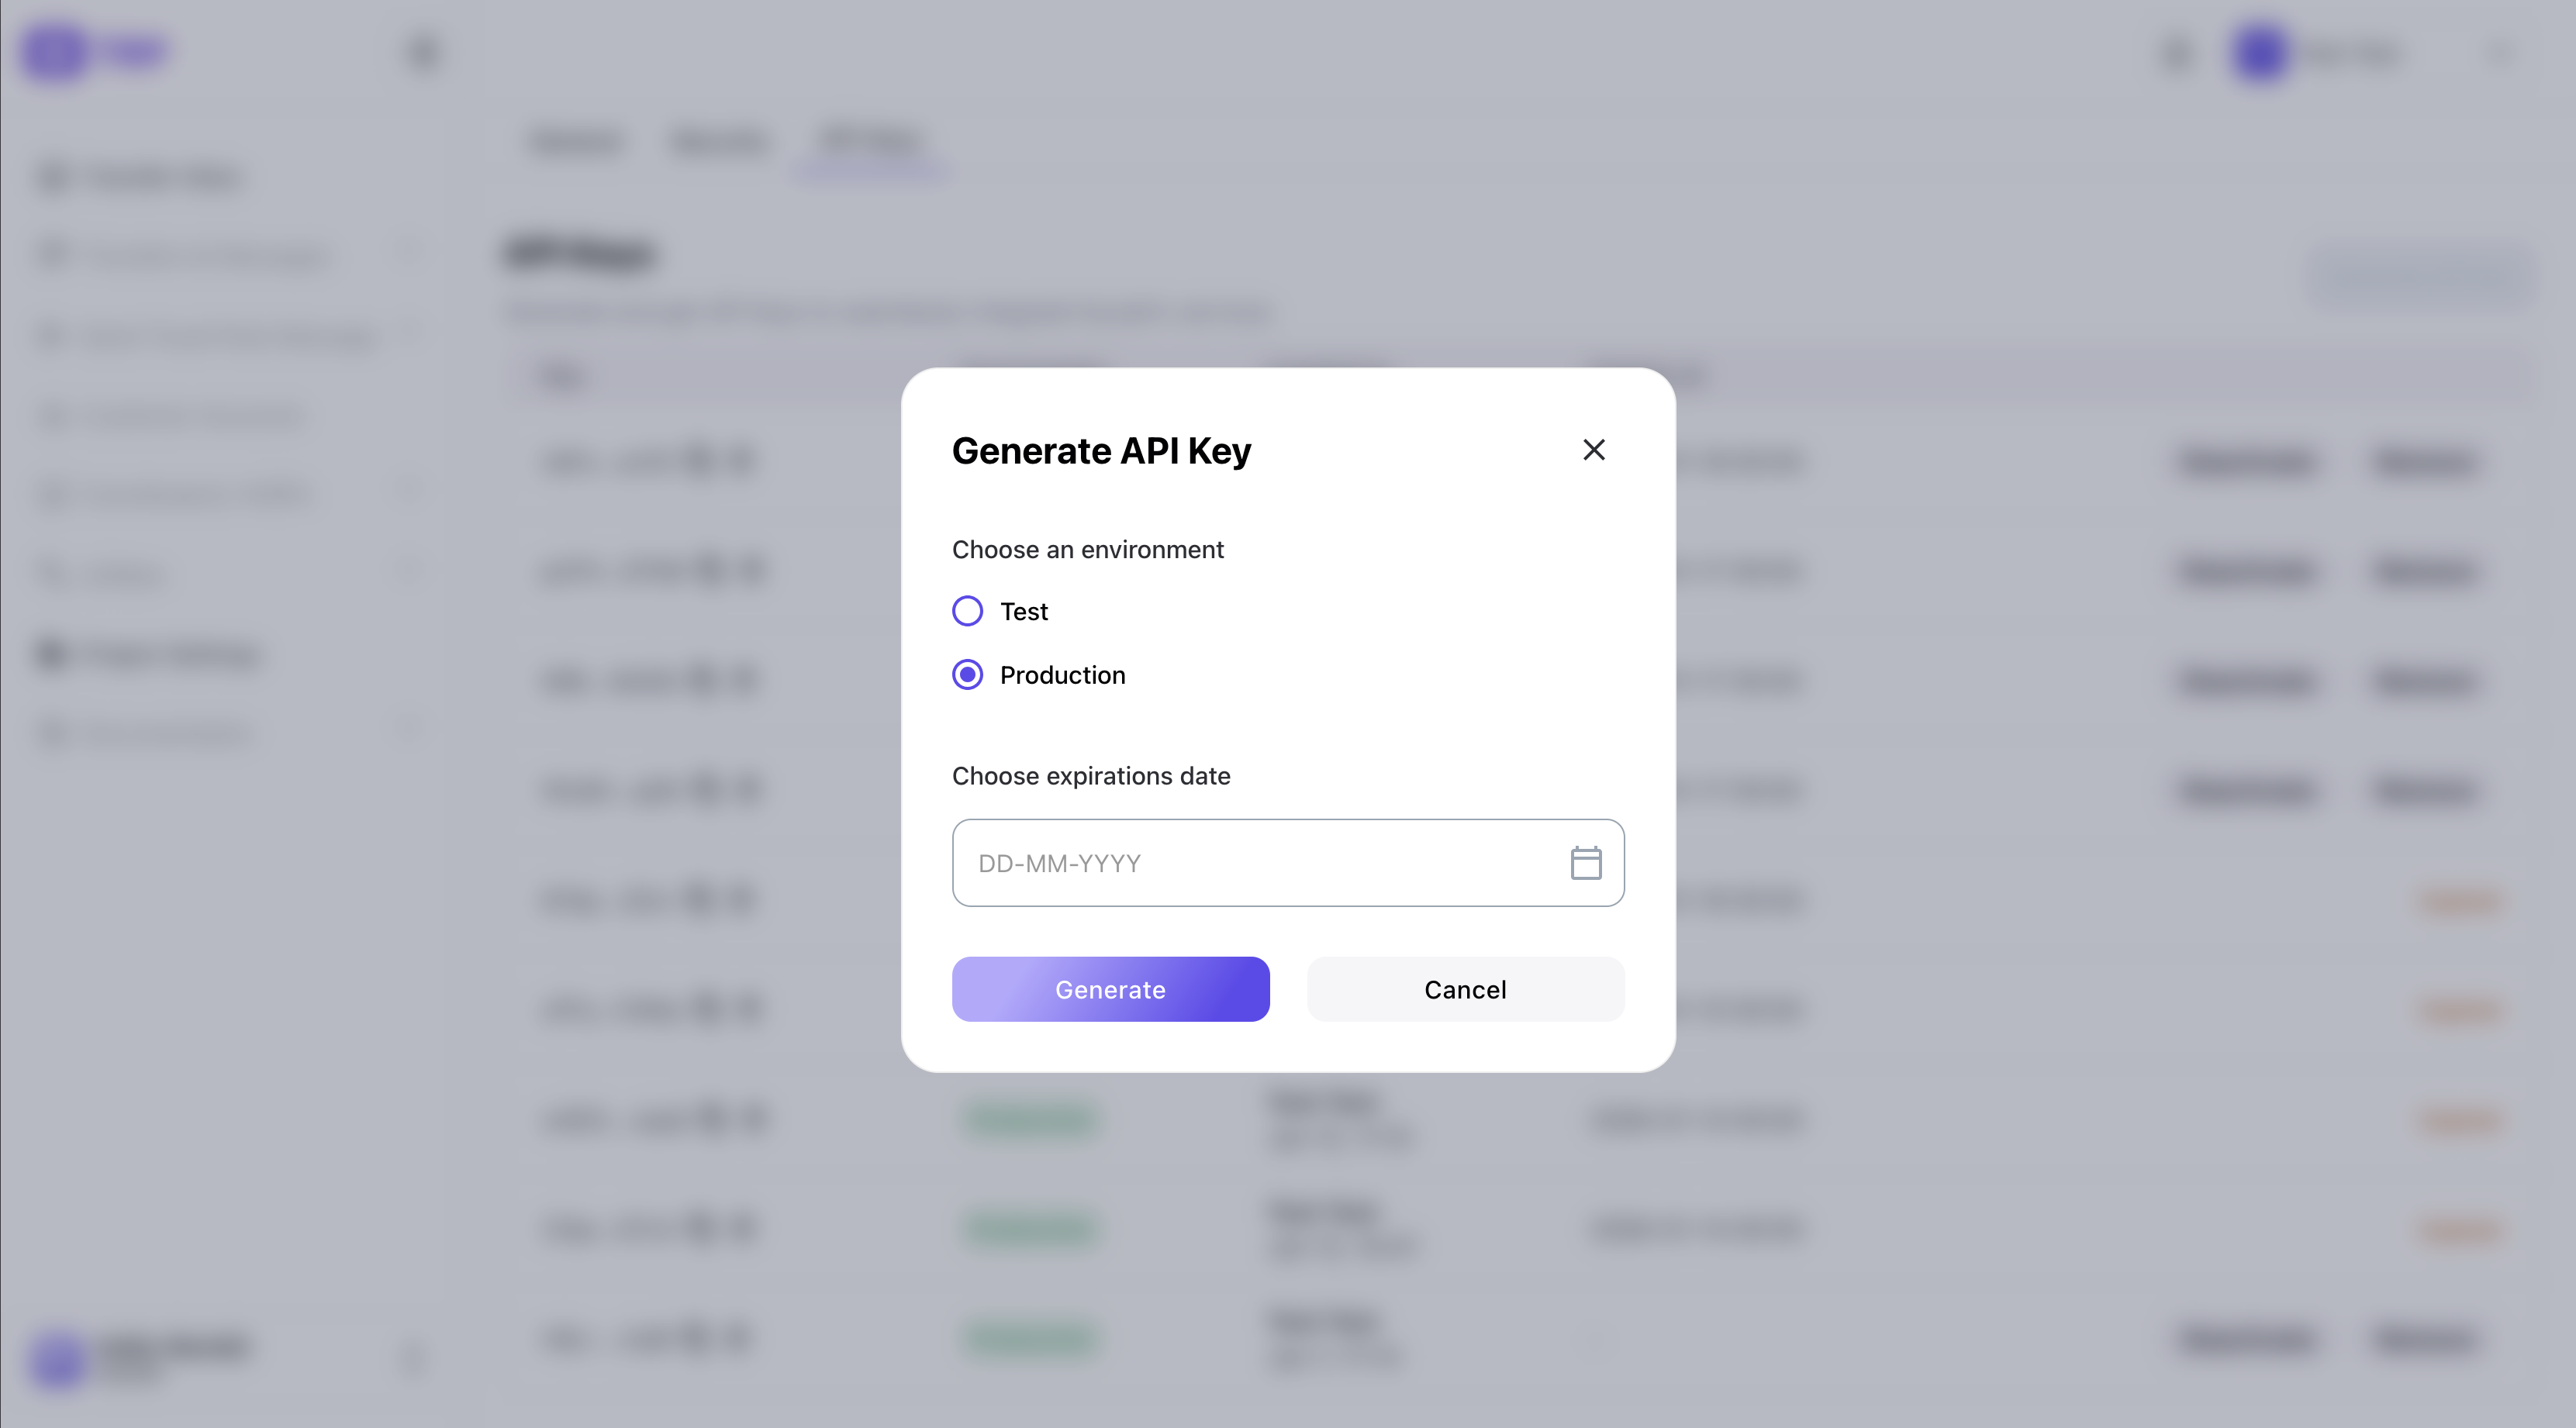
Step 2. Generate a Production API Key. Create an API key for the production environment with an expiration date set in the future.
👉 Go to: Settings
Result: You will obtain a Production API Key that can be used to authenticate API requests.
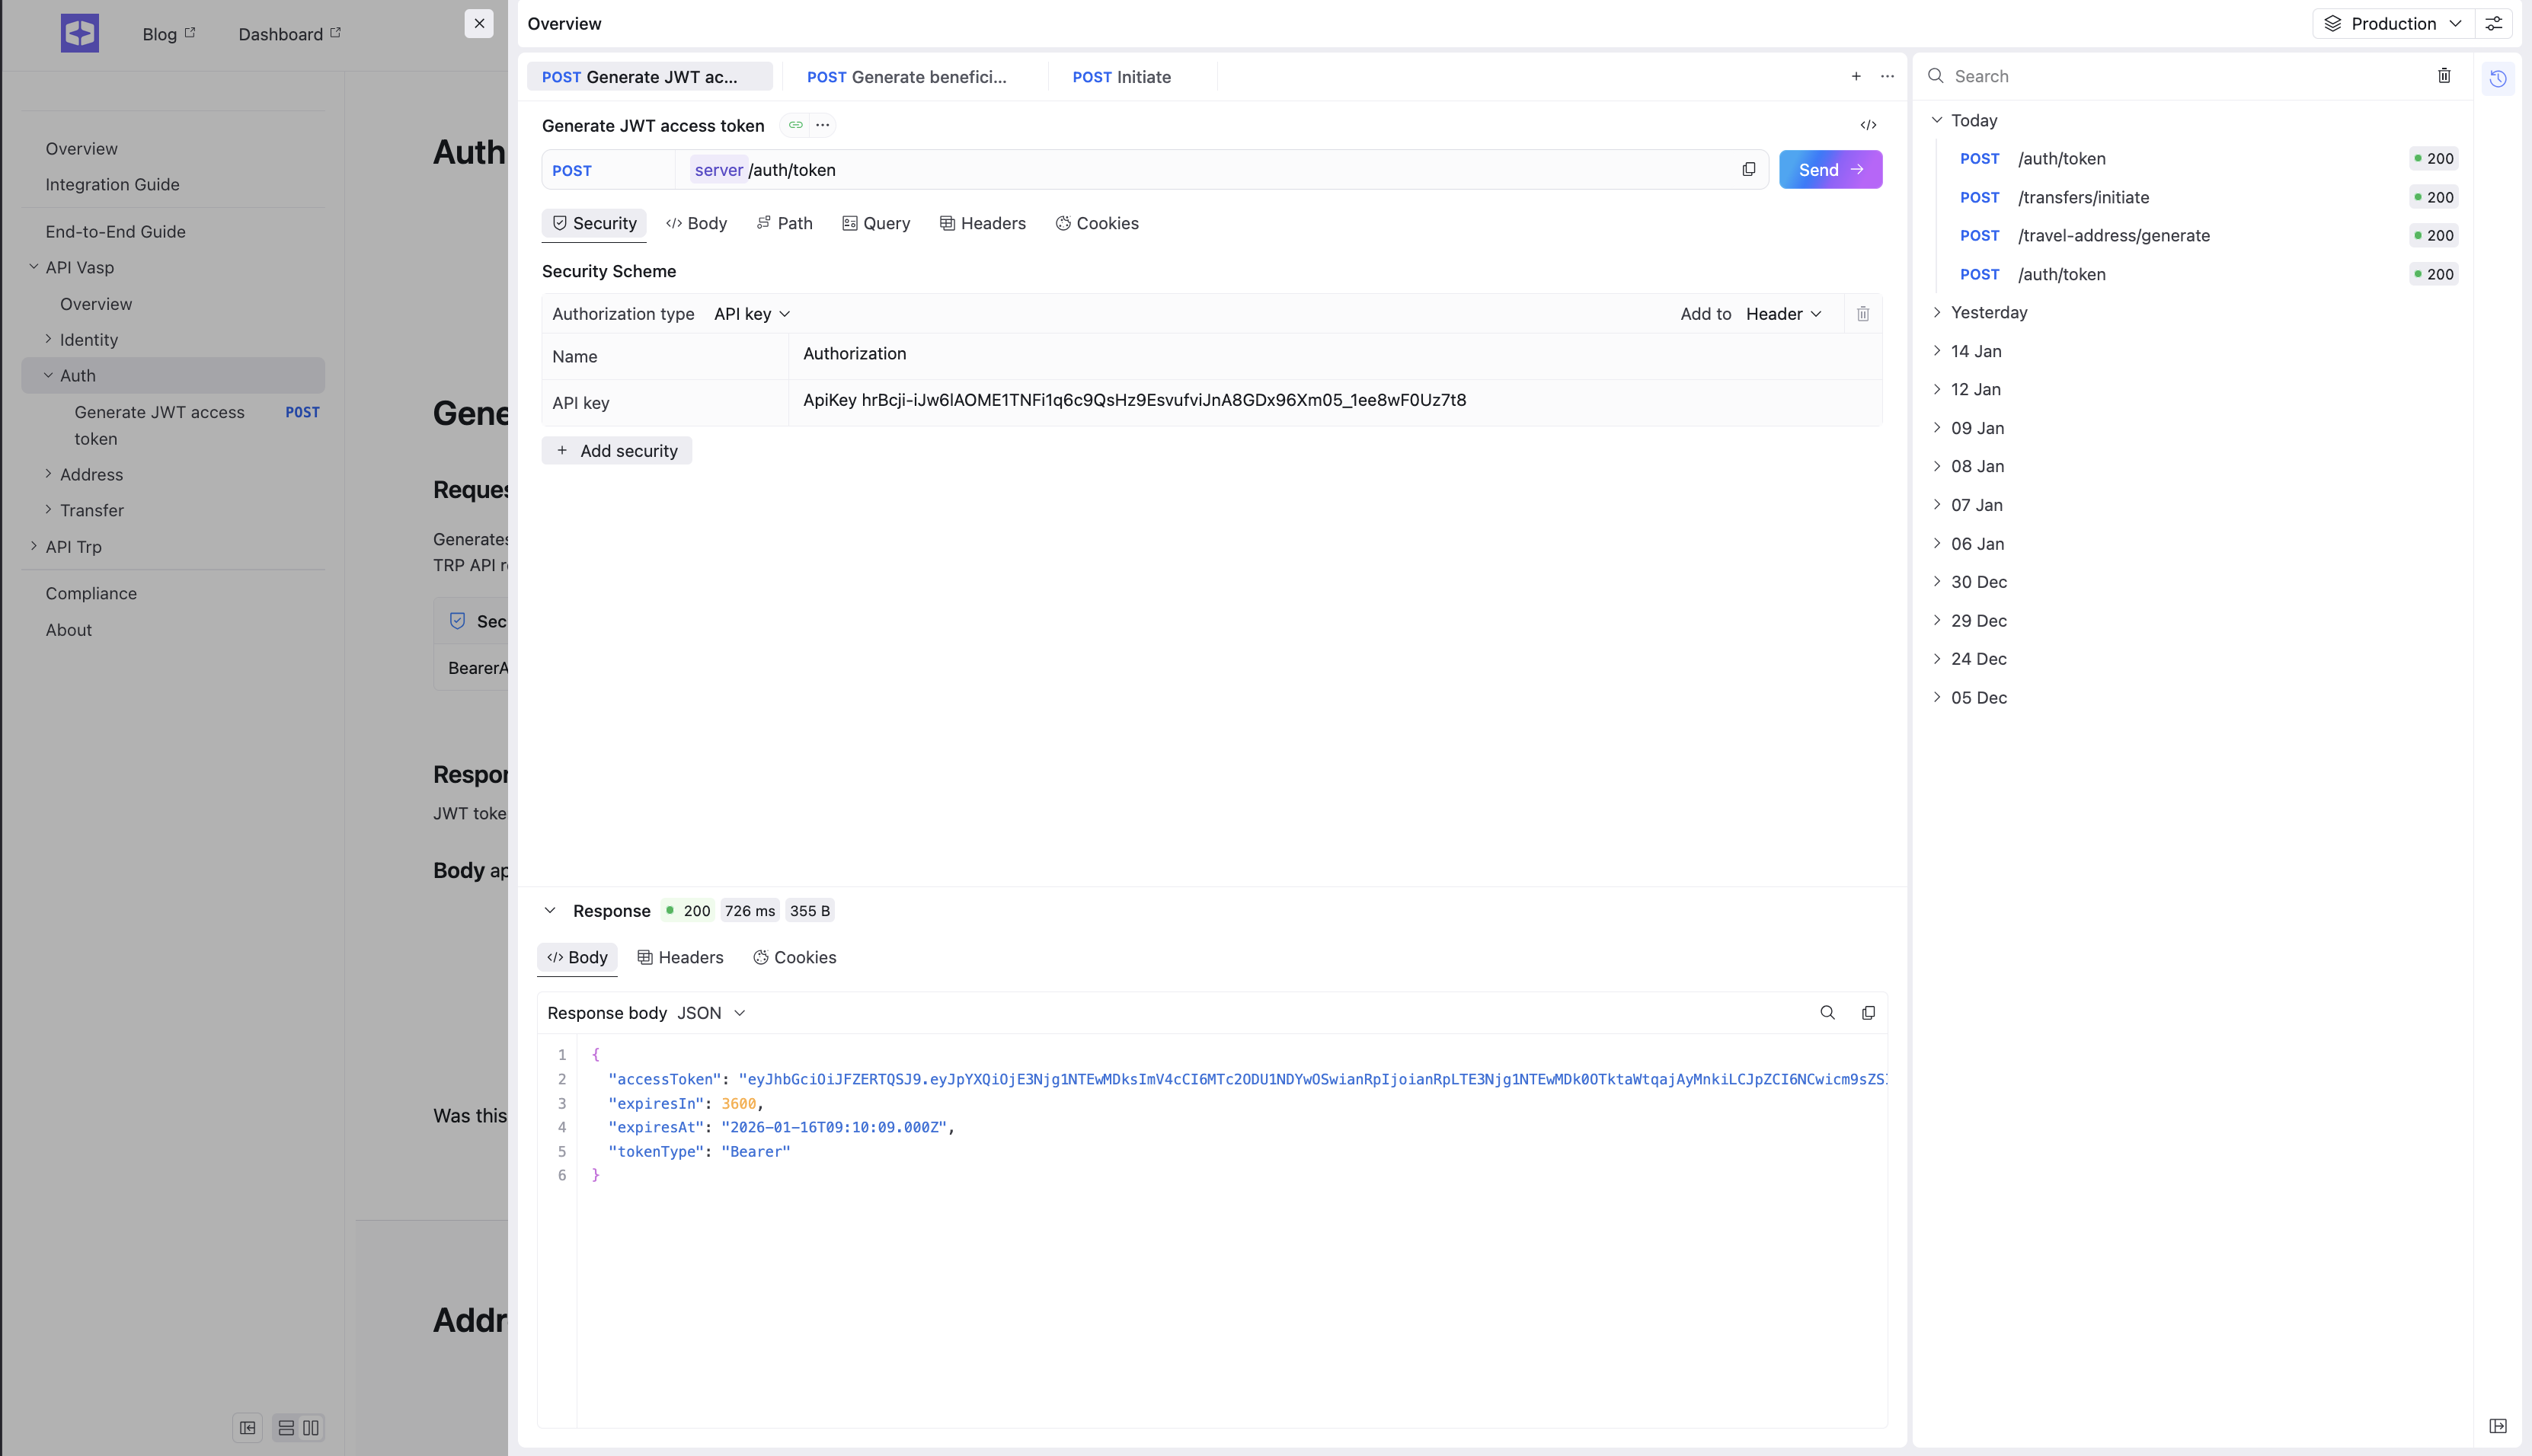
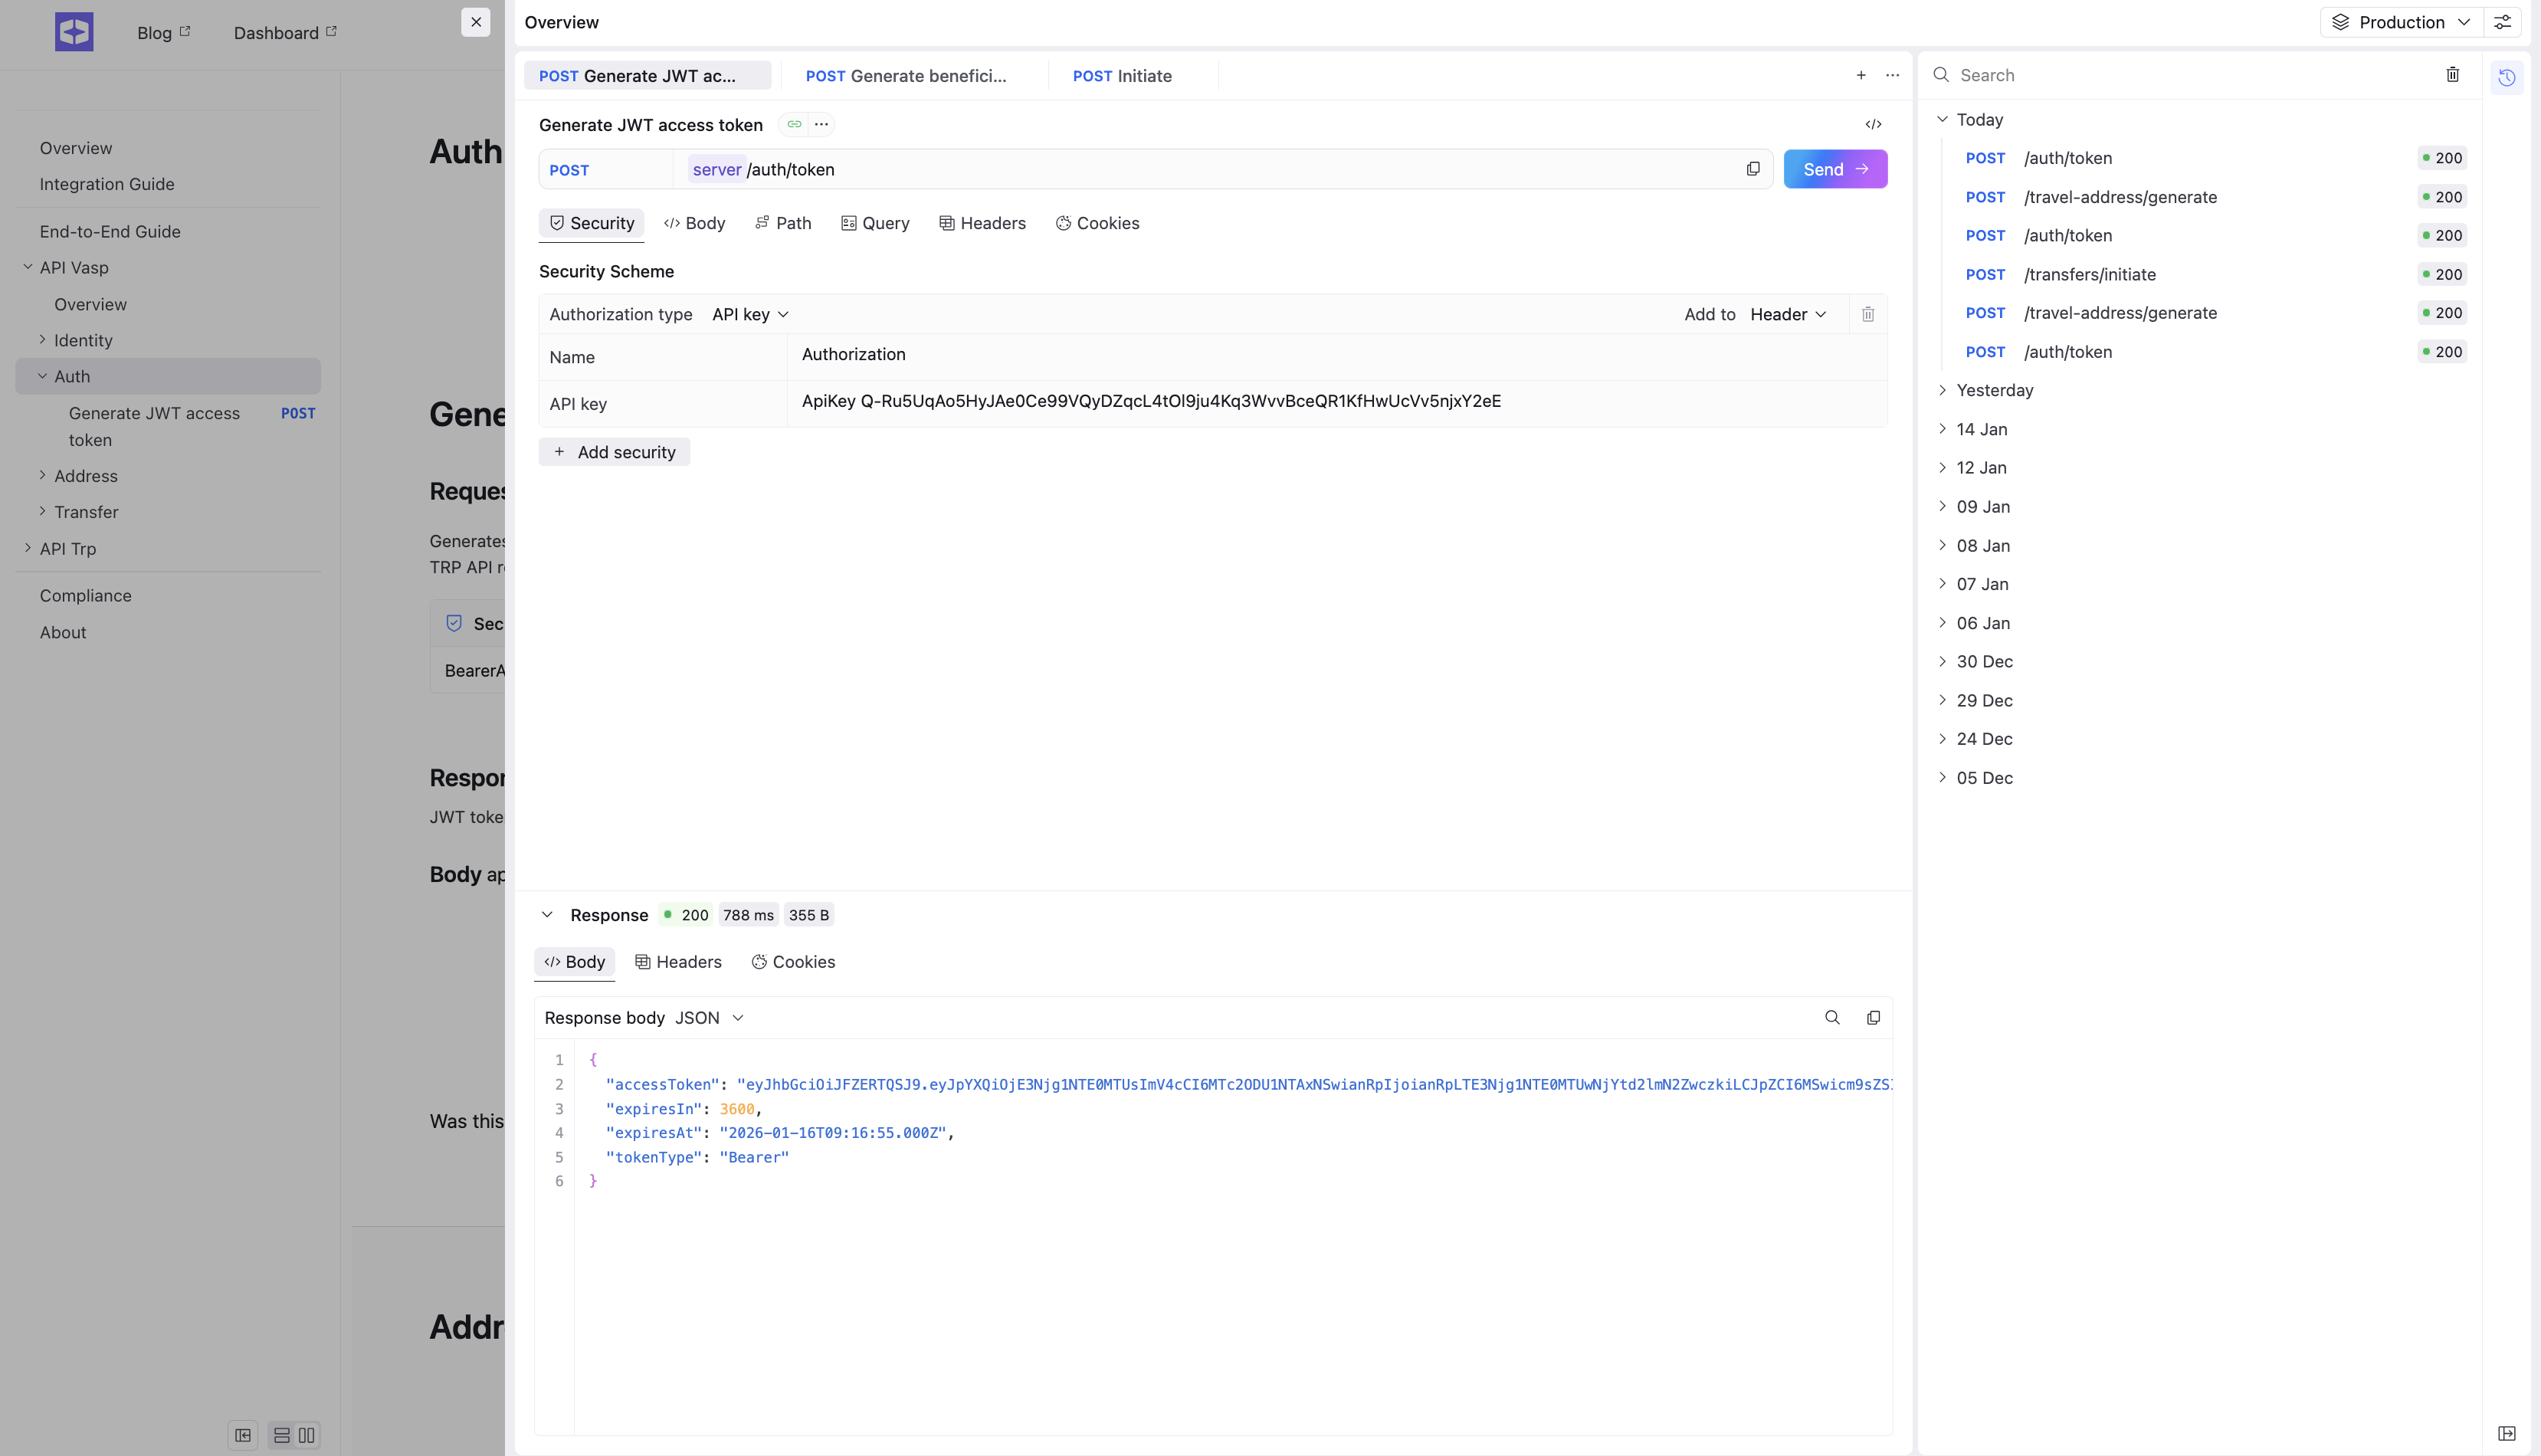
Step 3. Generate an Access Token
Use your API key to create an authorization request.
👉 Go to: API documentation
Send the authorization request as described in the documentation.
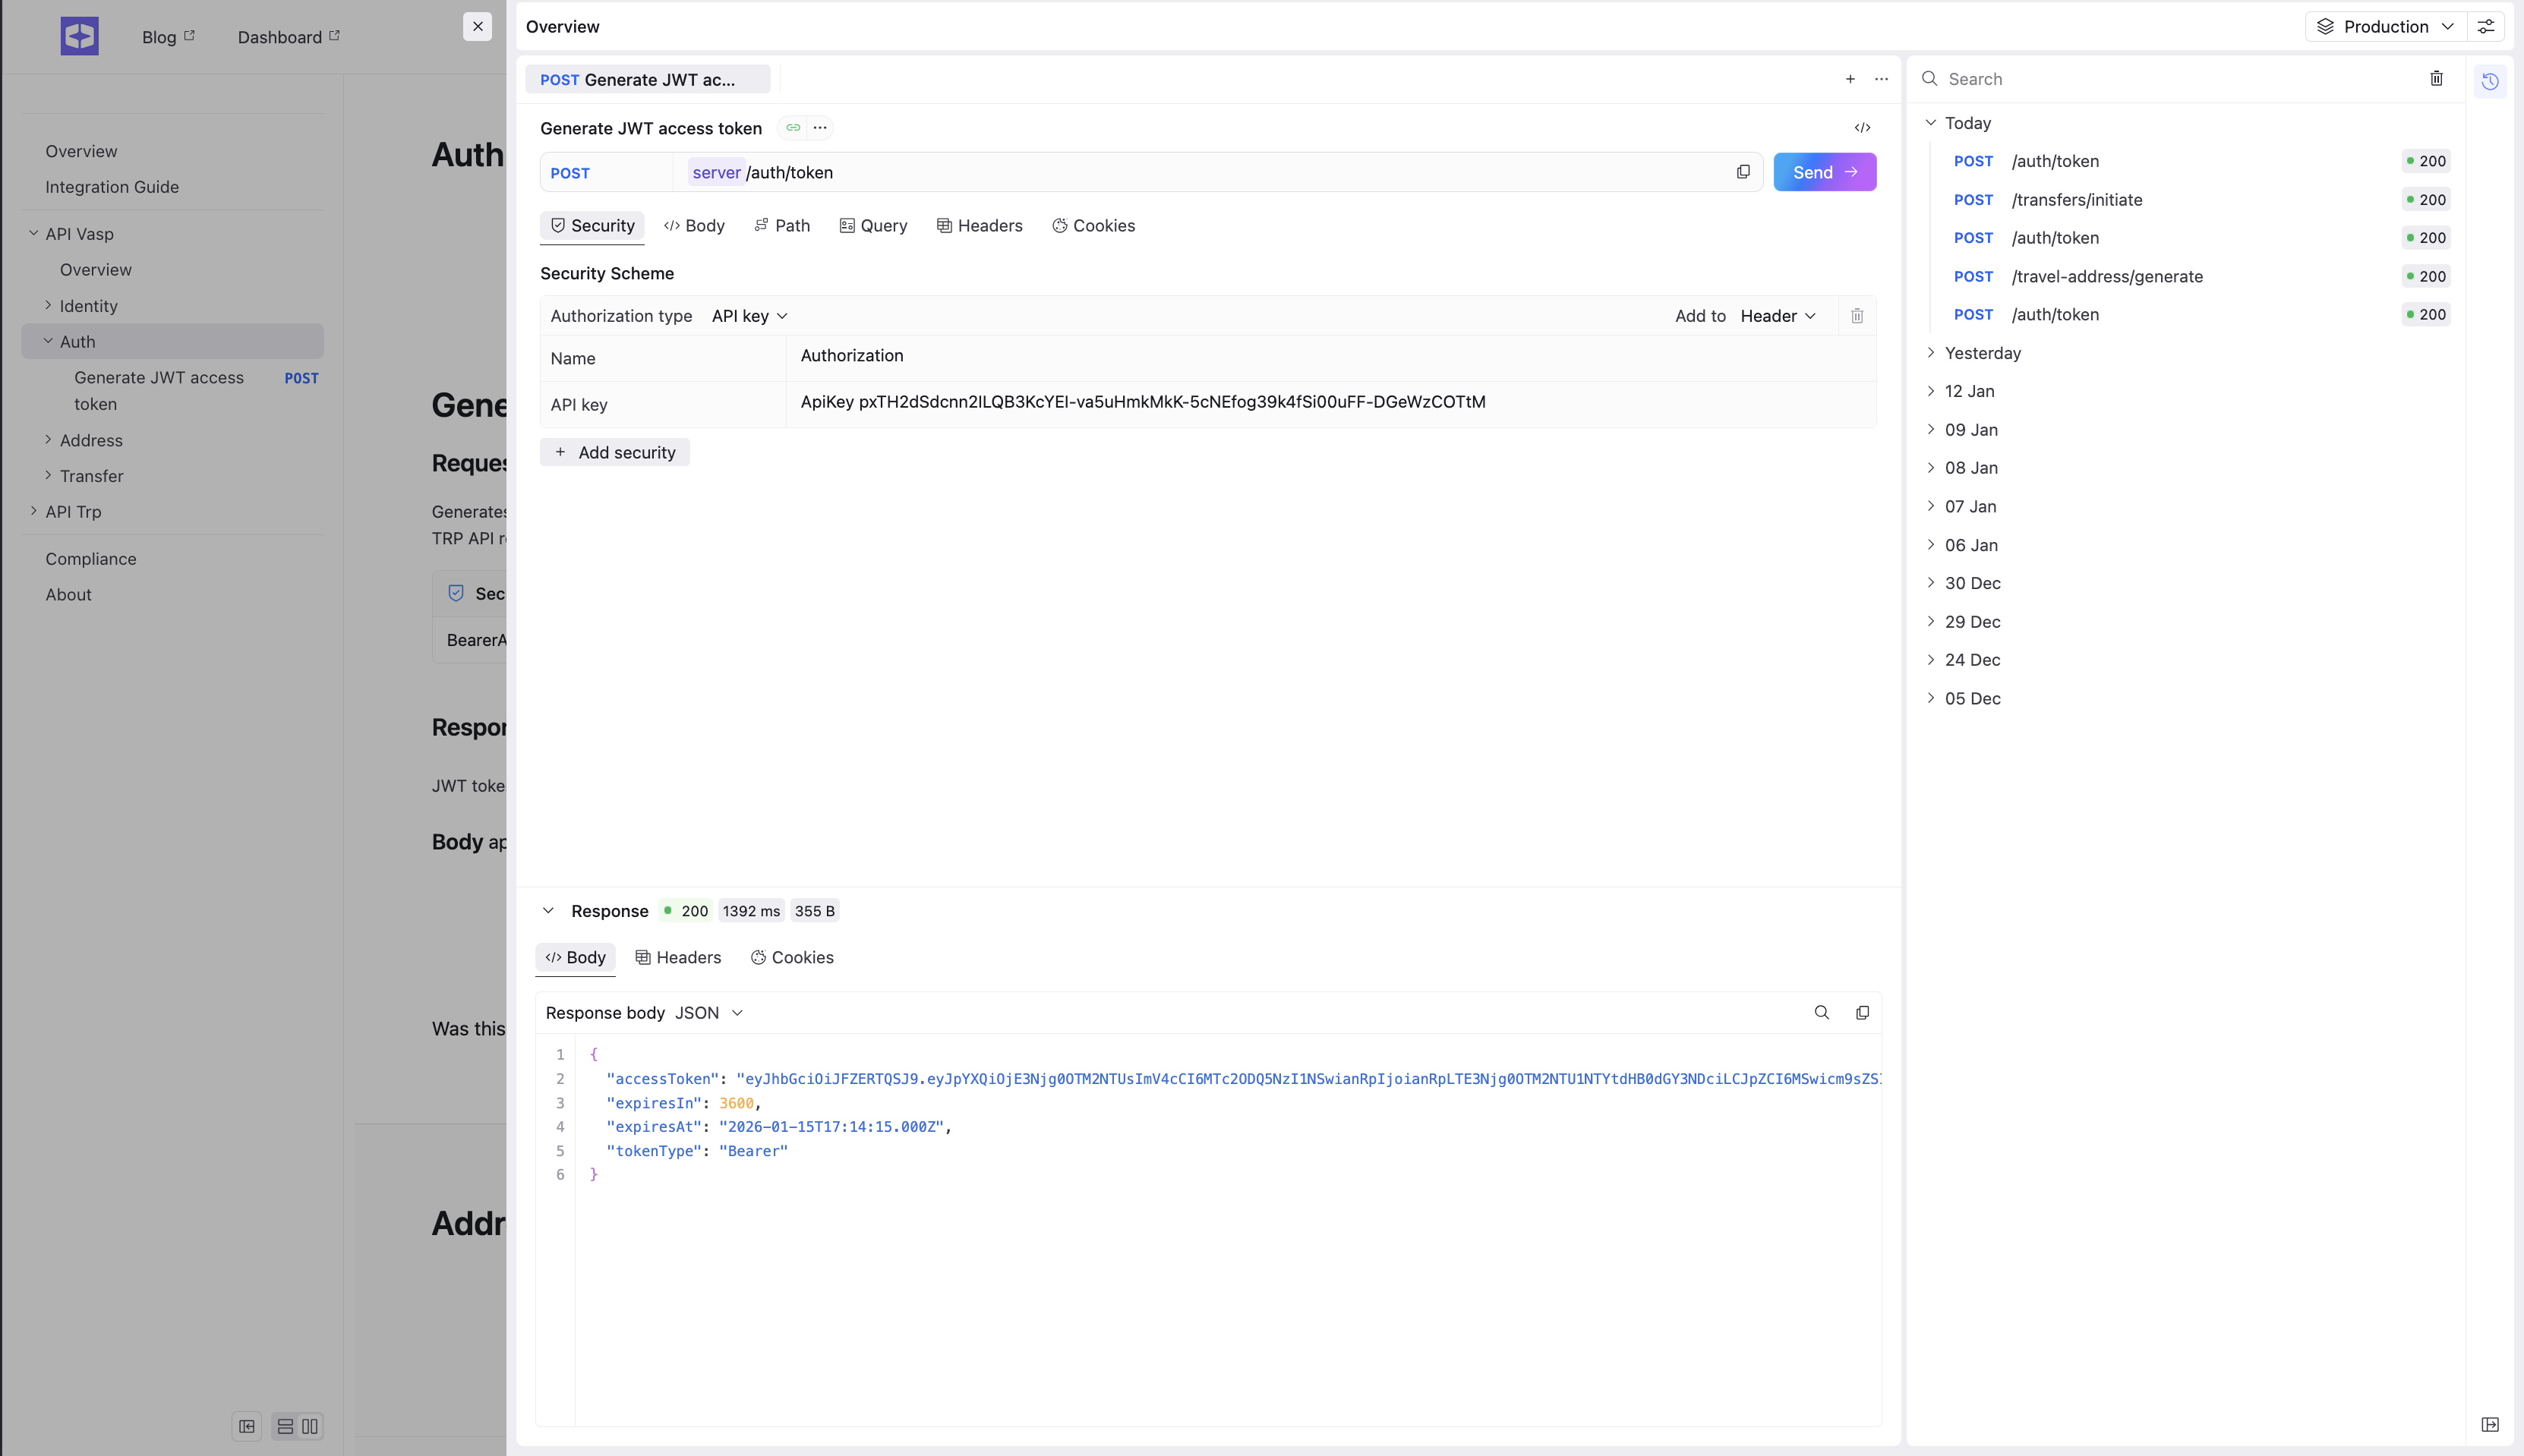
Result: The response will contain an access token.
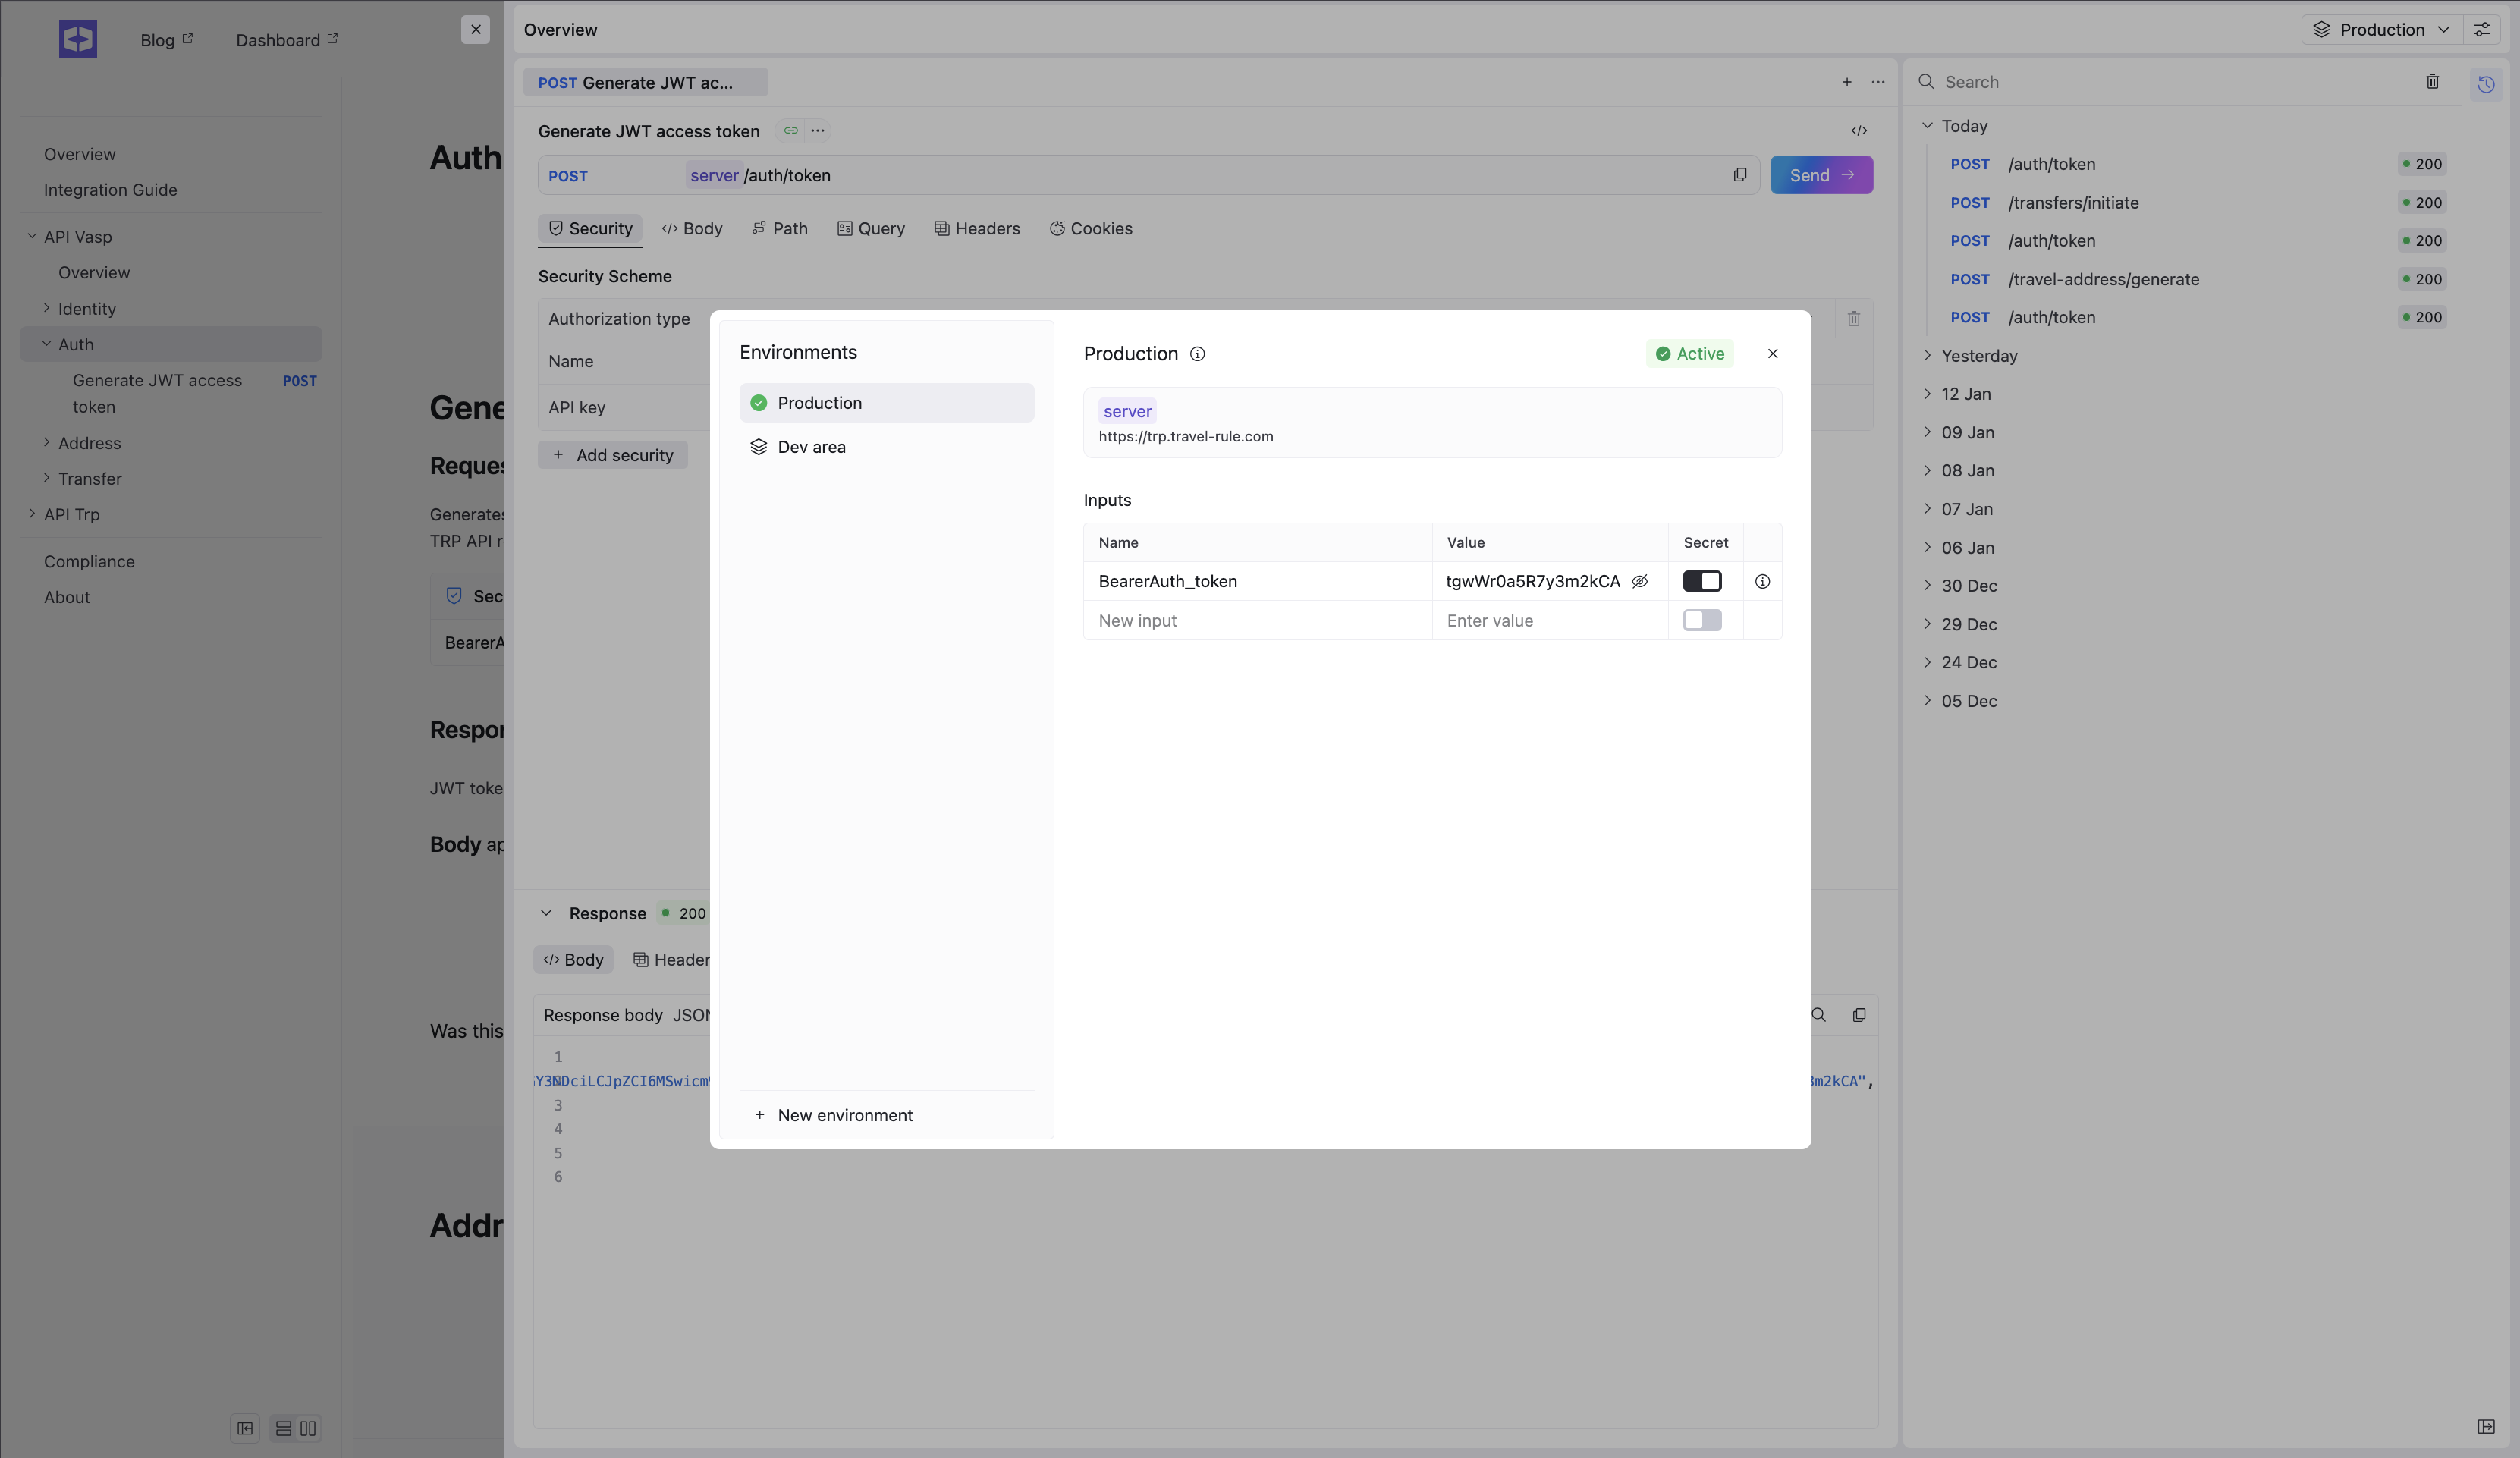
Step 4. Configure the Access Token
Copy the received access token and add it to the authorization settings of your API requests (for example, as a Bearer token in request headers).
Result: Your API requests are now authenticated.
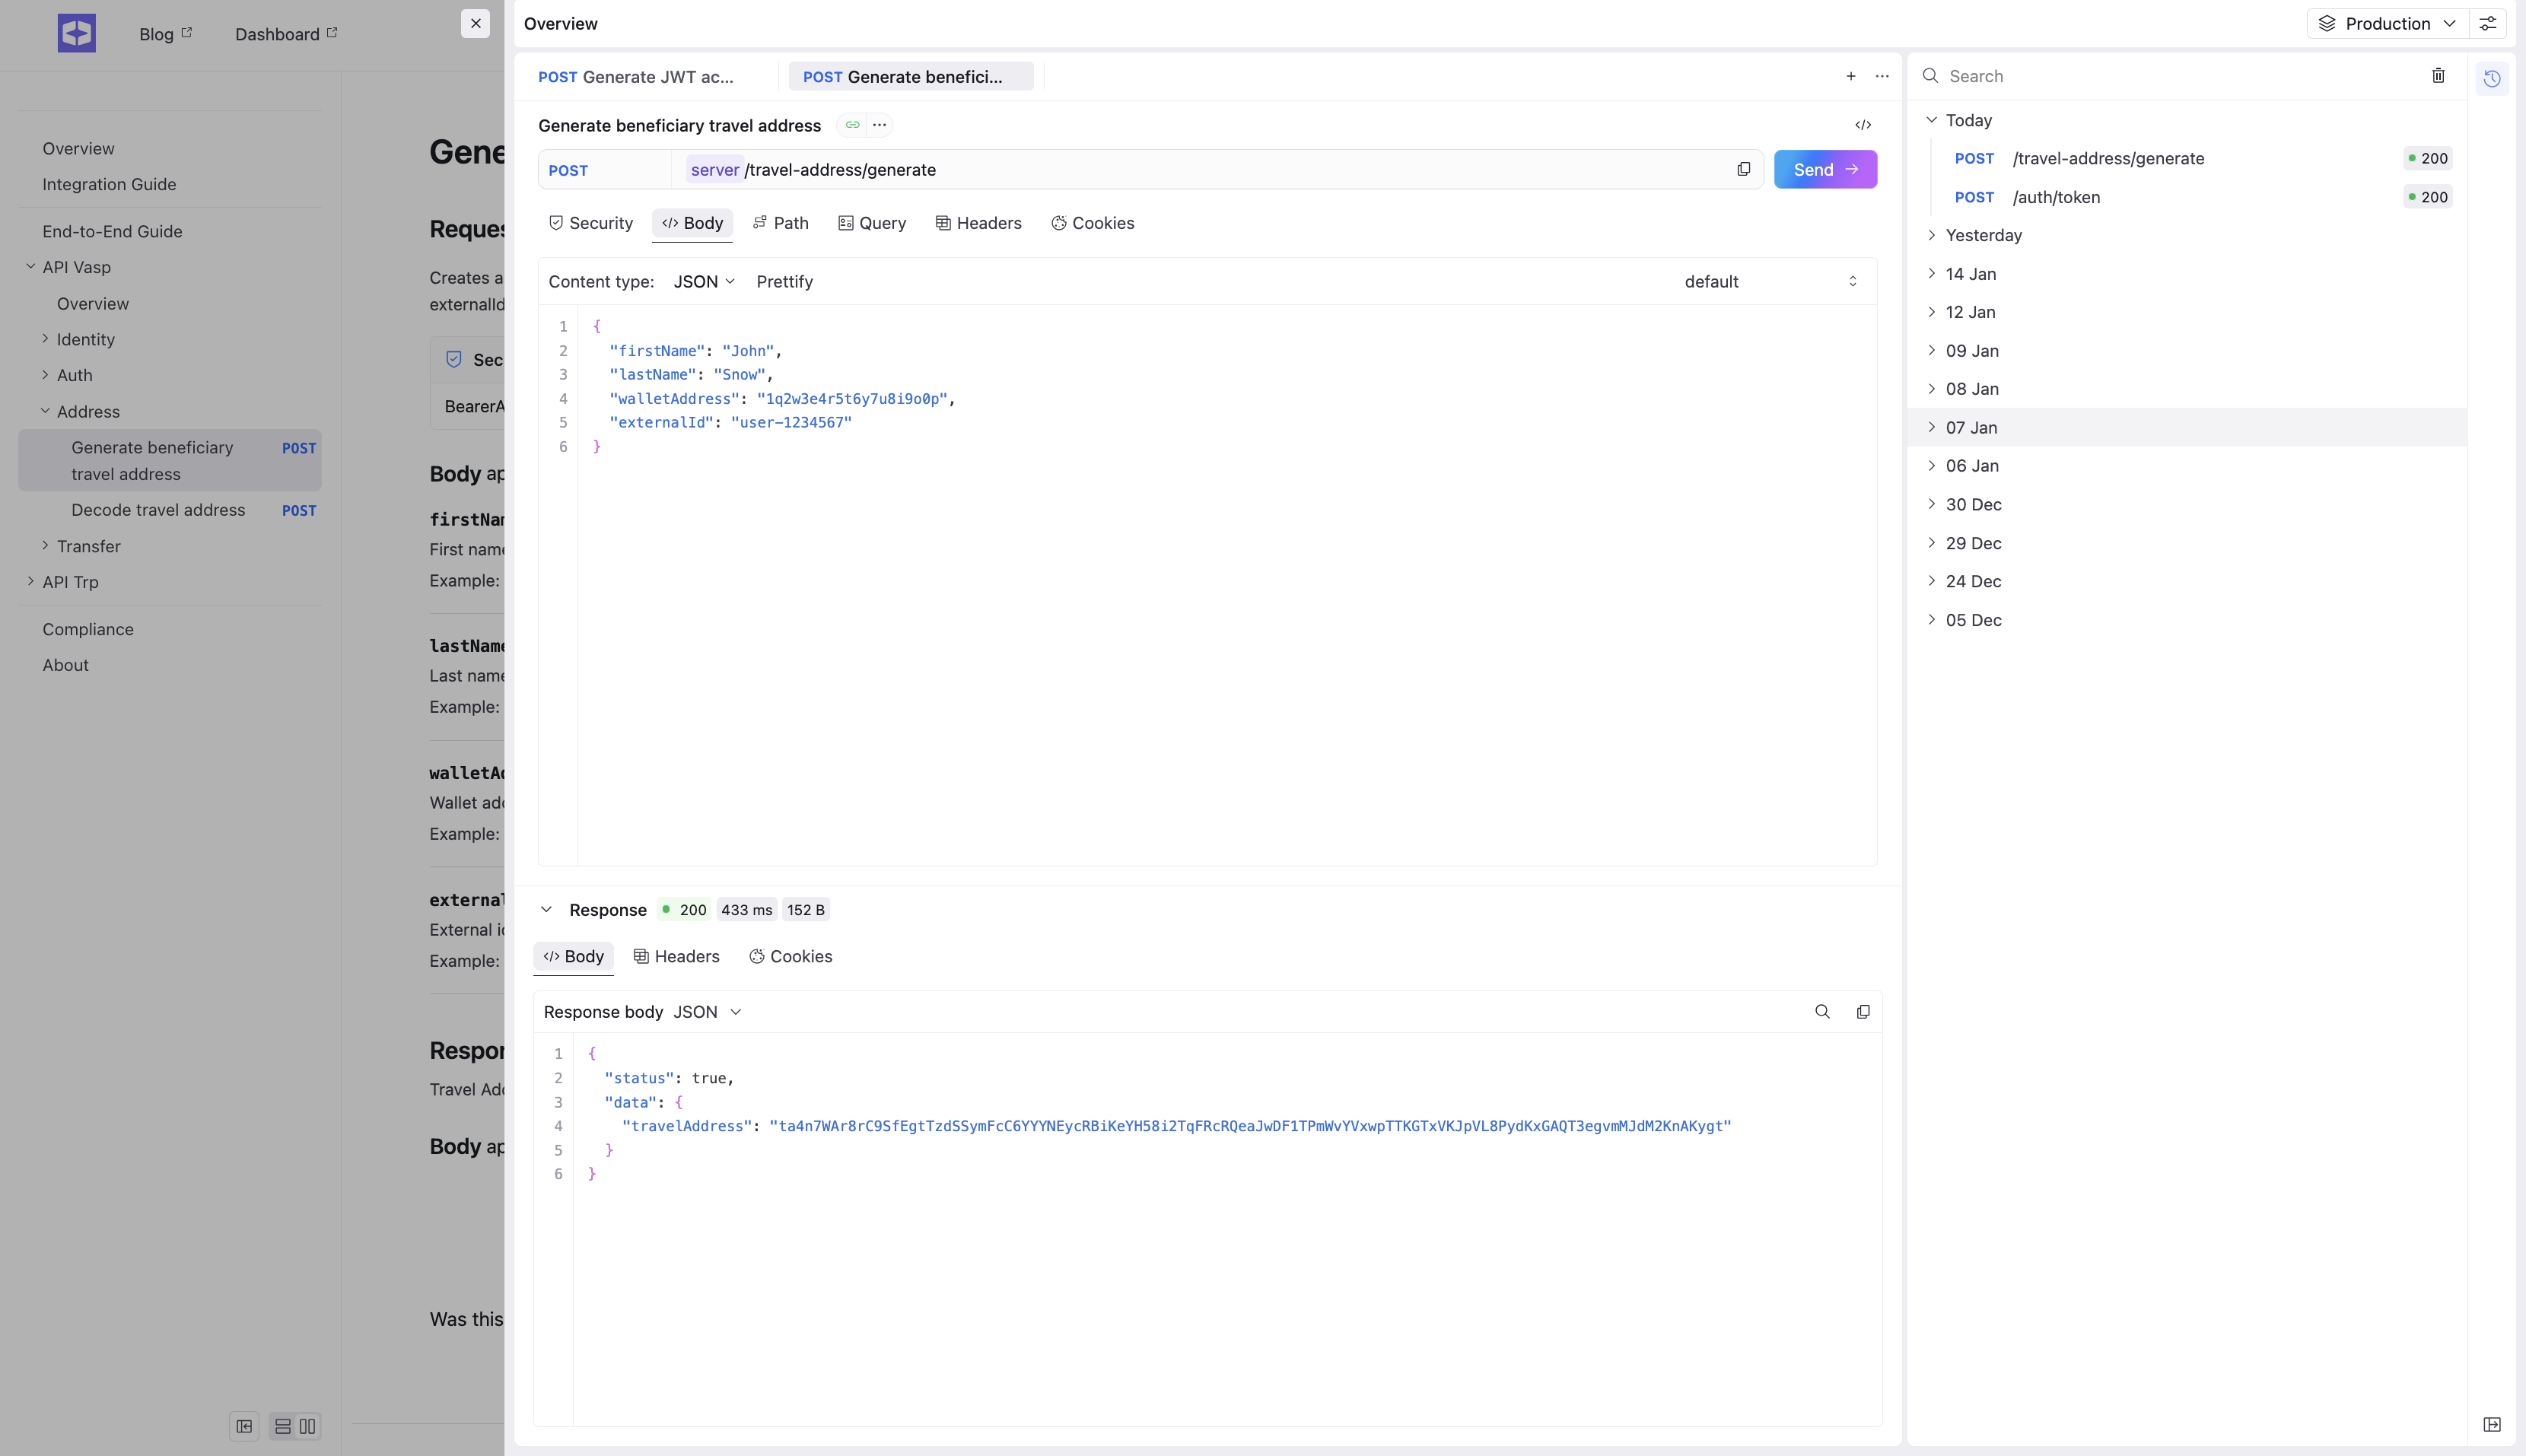
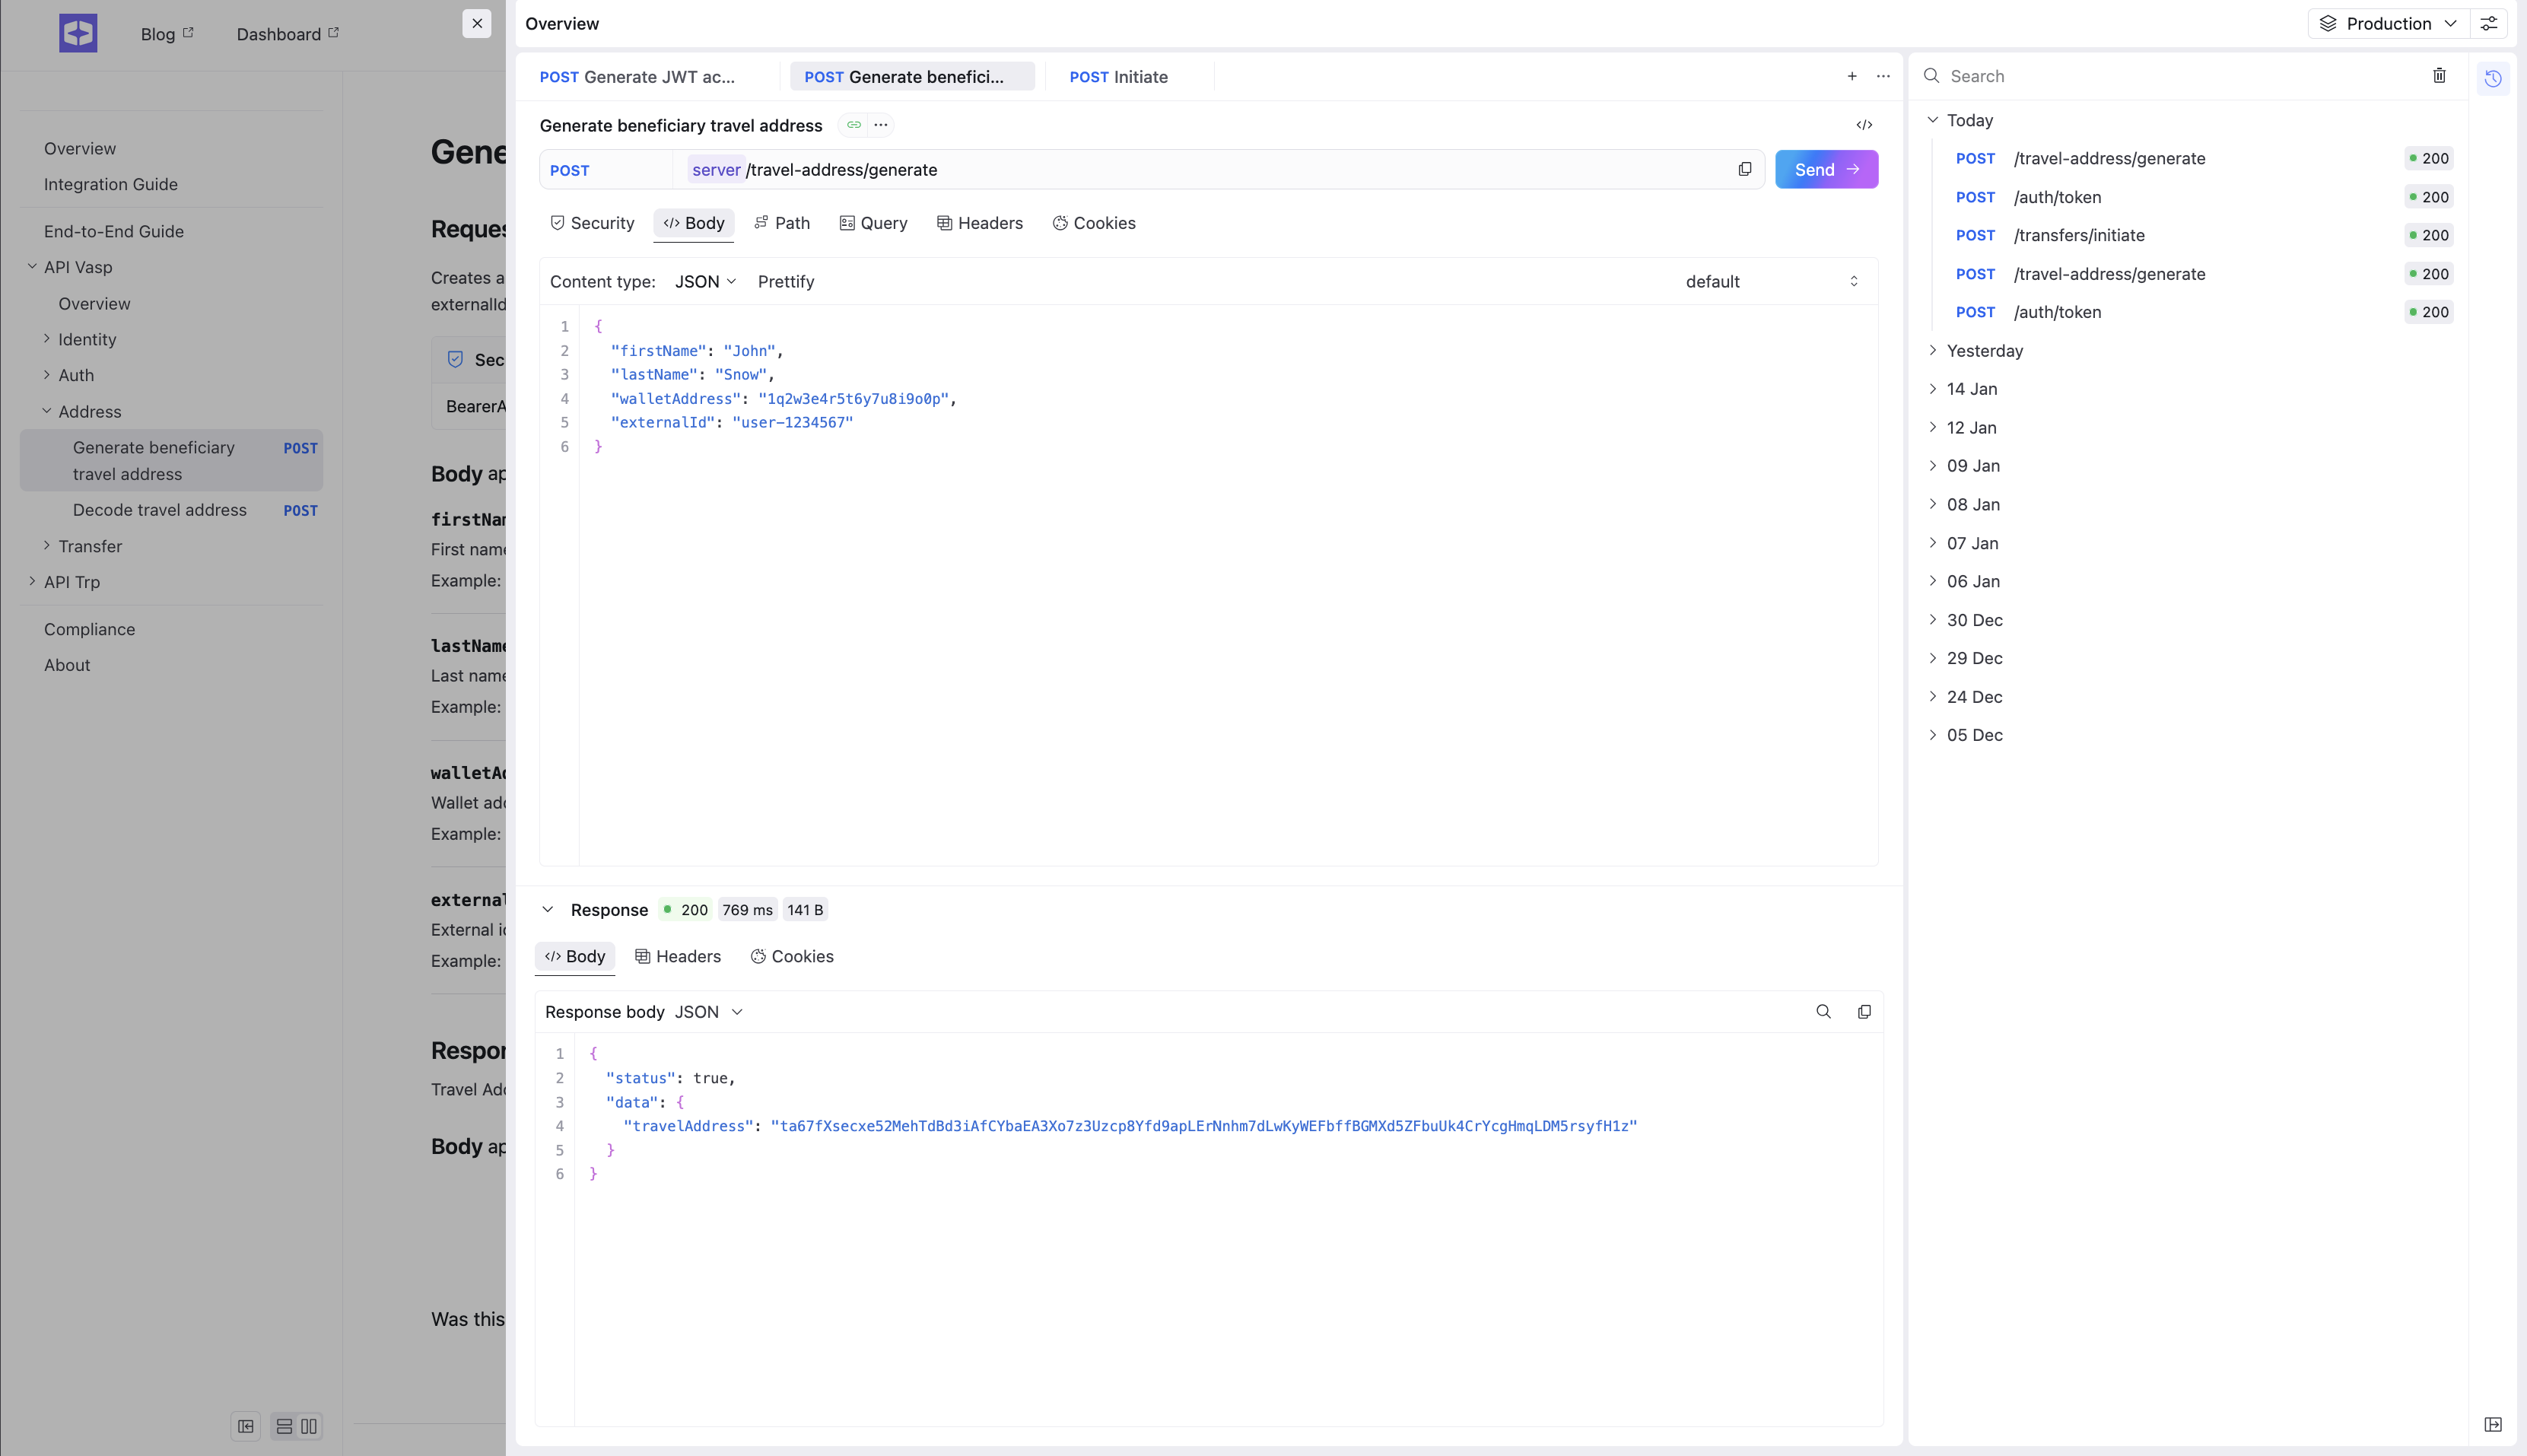
Step 5. Generate a Travel Address
Call the Travel Address generation endpoint.
👉 Go to: API documentation
Send the request according to the specification.
Result: The response will contain a Travel Address.
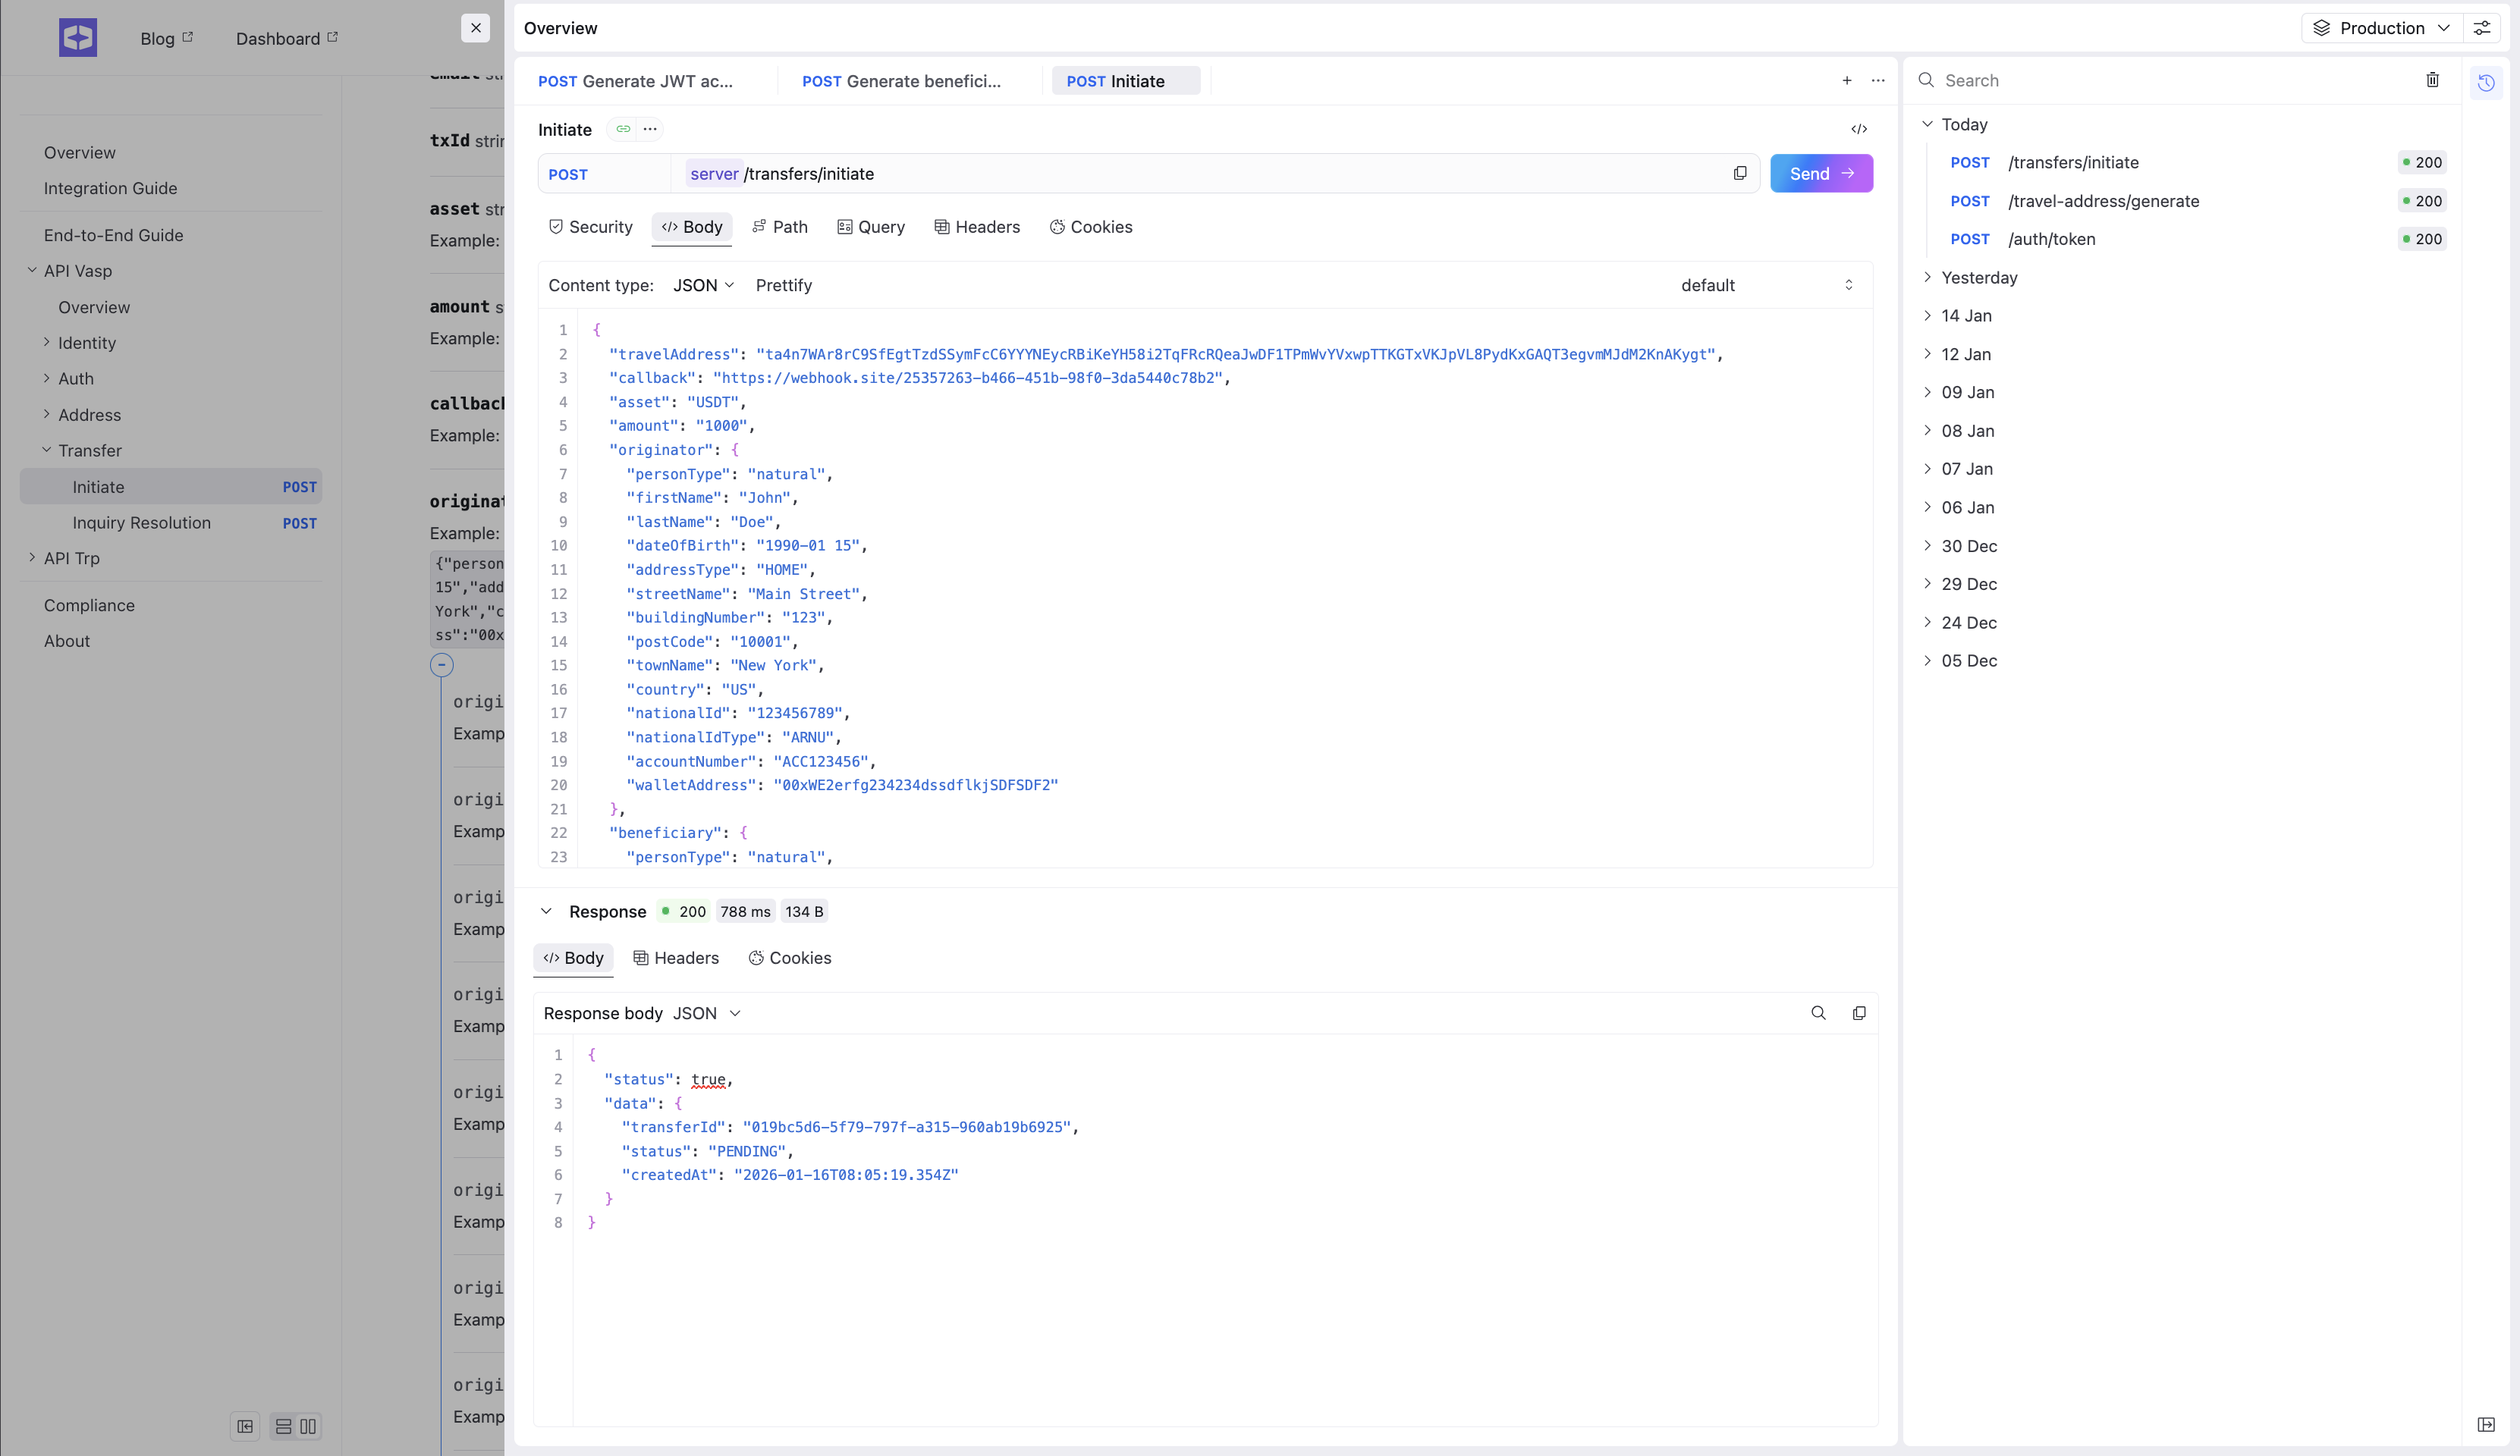
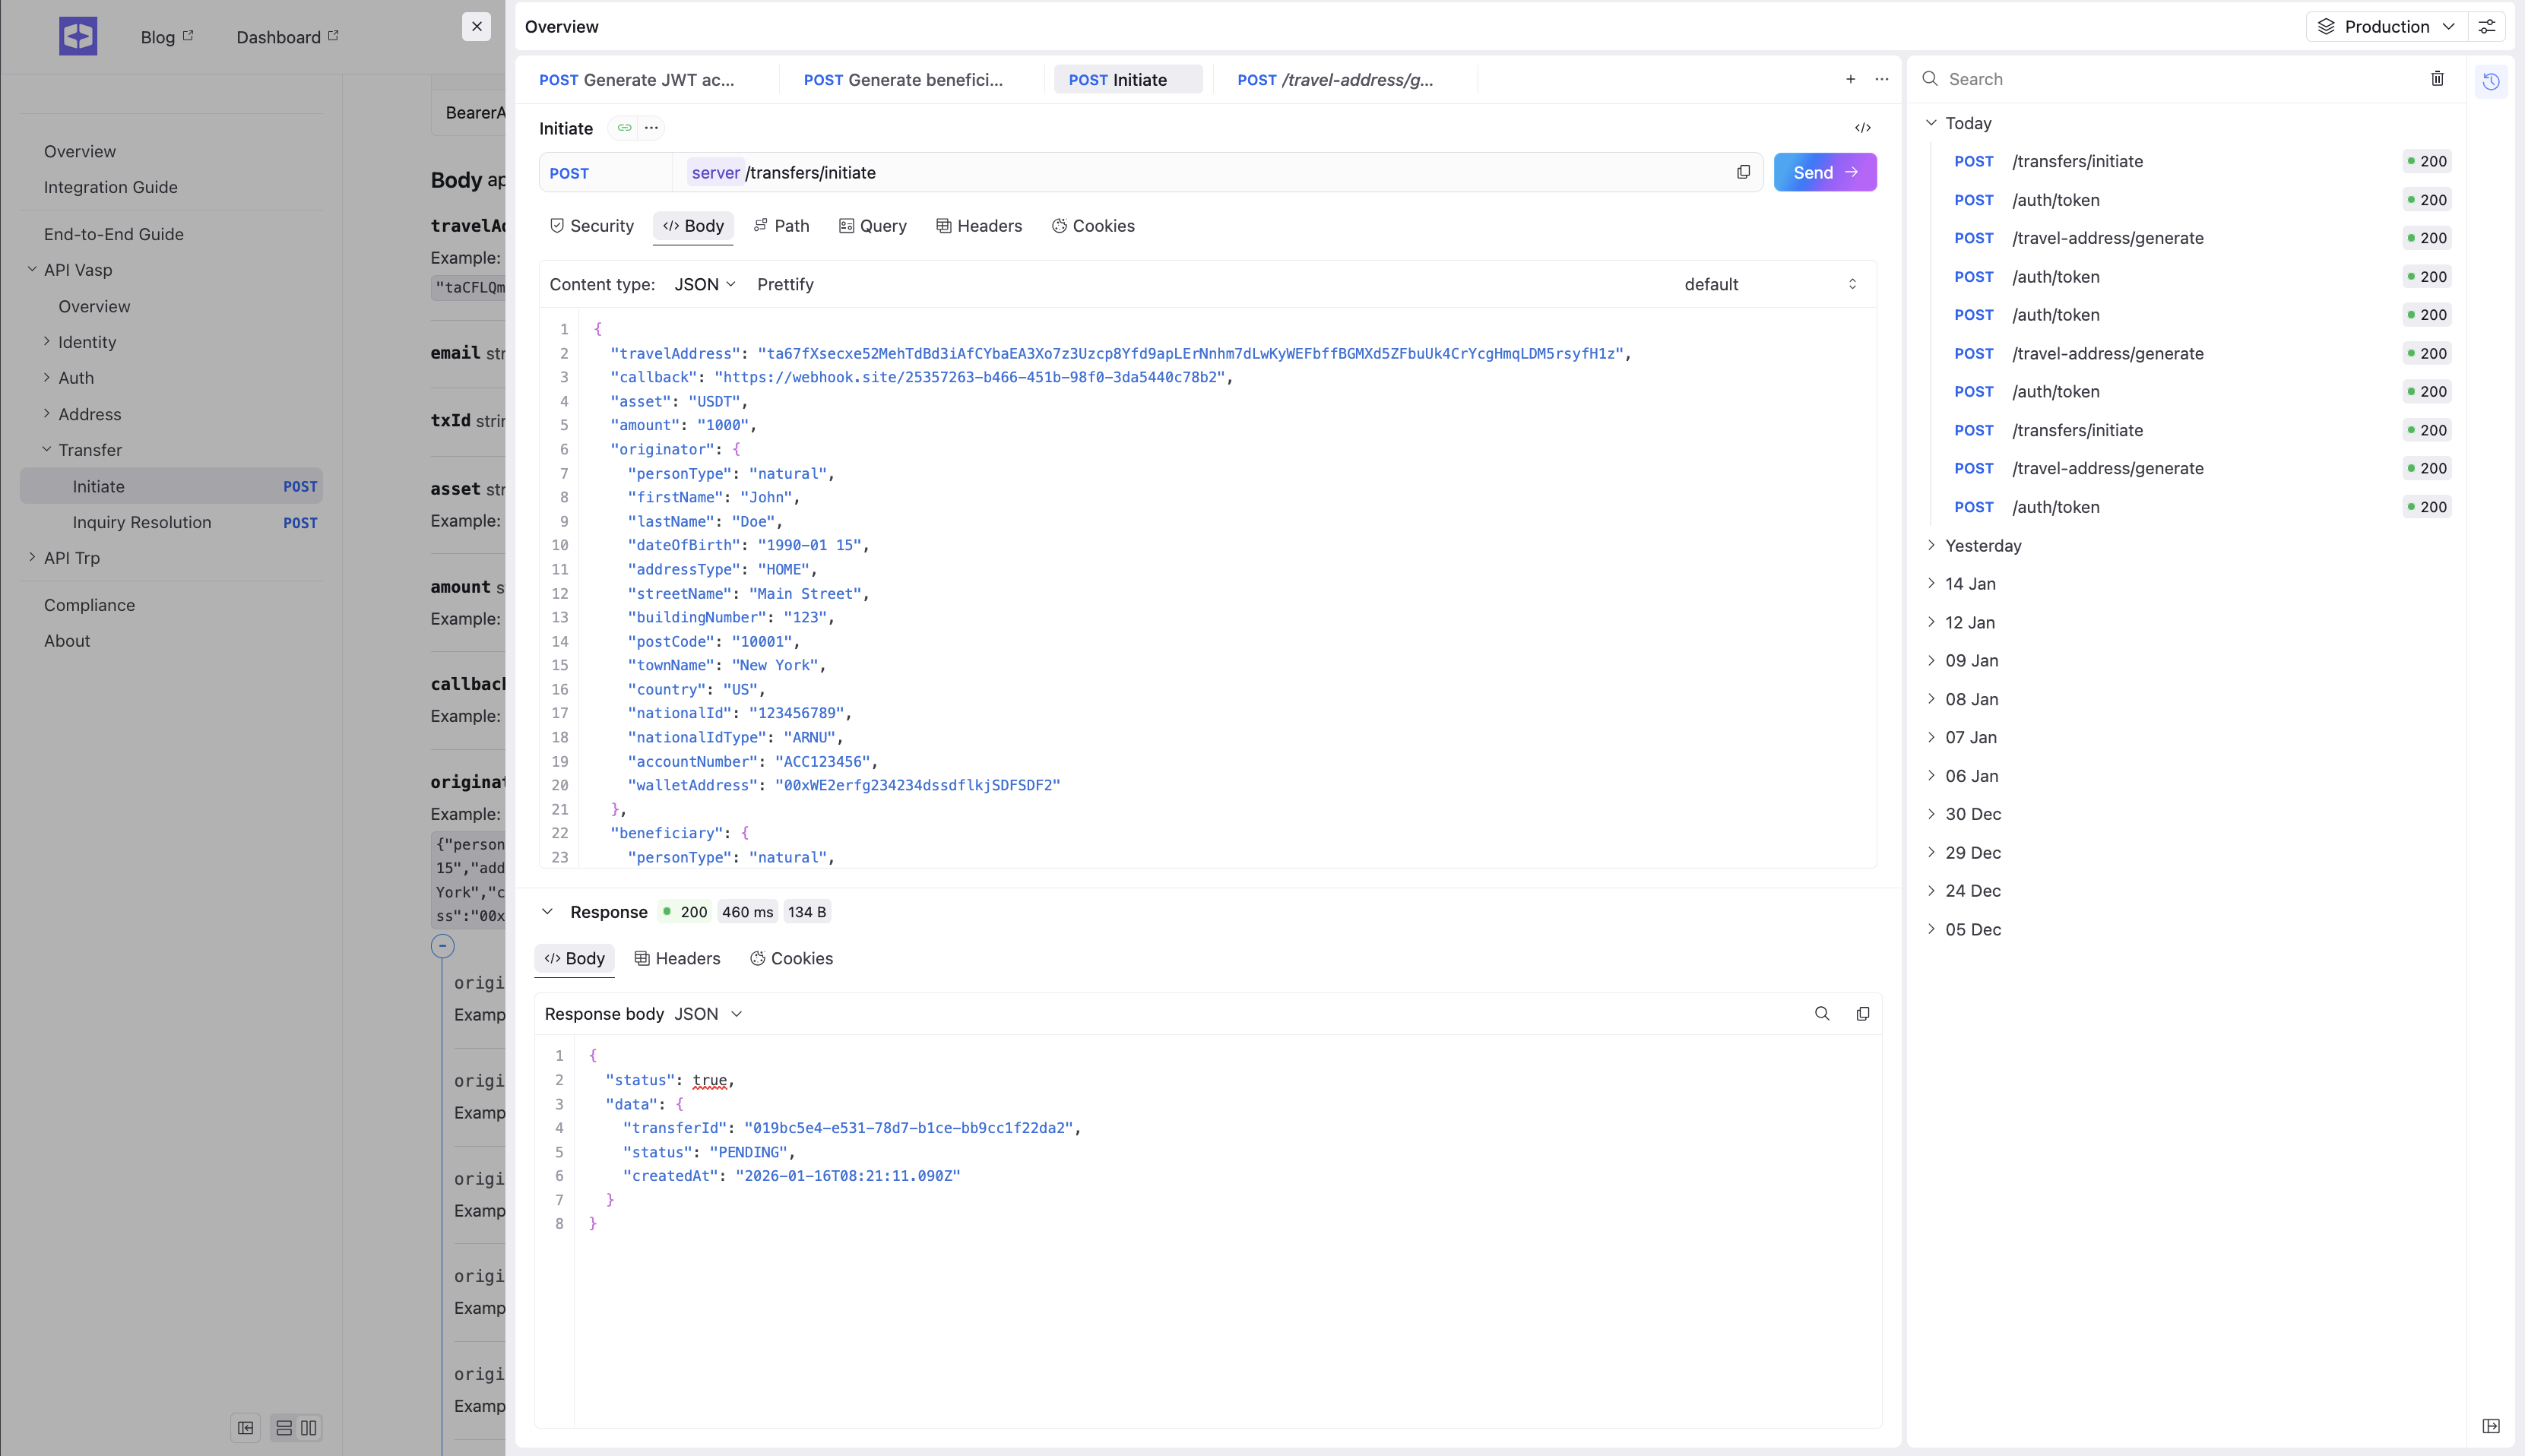
Step 6. Create a Transfer
Use the generated Travel Address to create a transfer.
👉 Go to: API documentation
While sending the request:
- Provide the Travel Address
- Specify a callback URL generated on Webhook
Result: The response will contain the transaction ID of the created transfer.
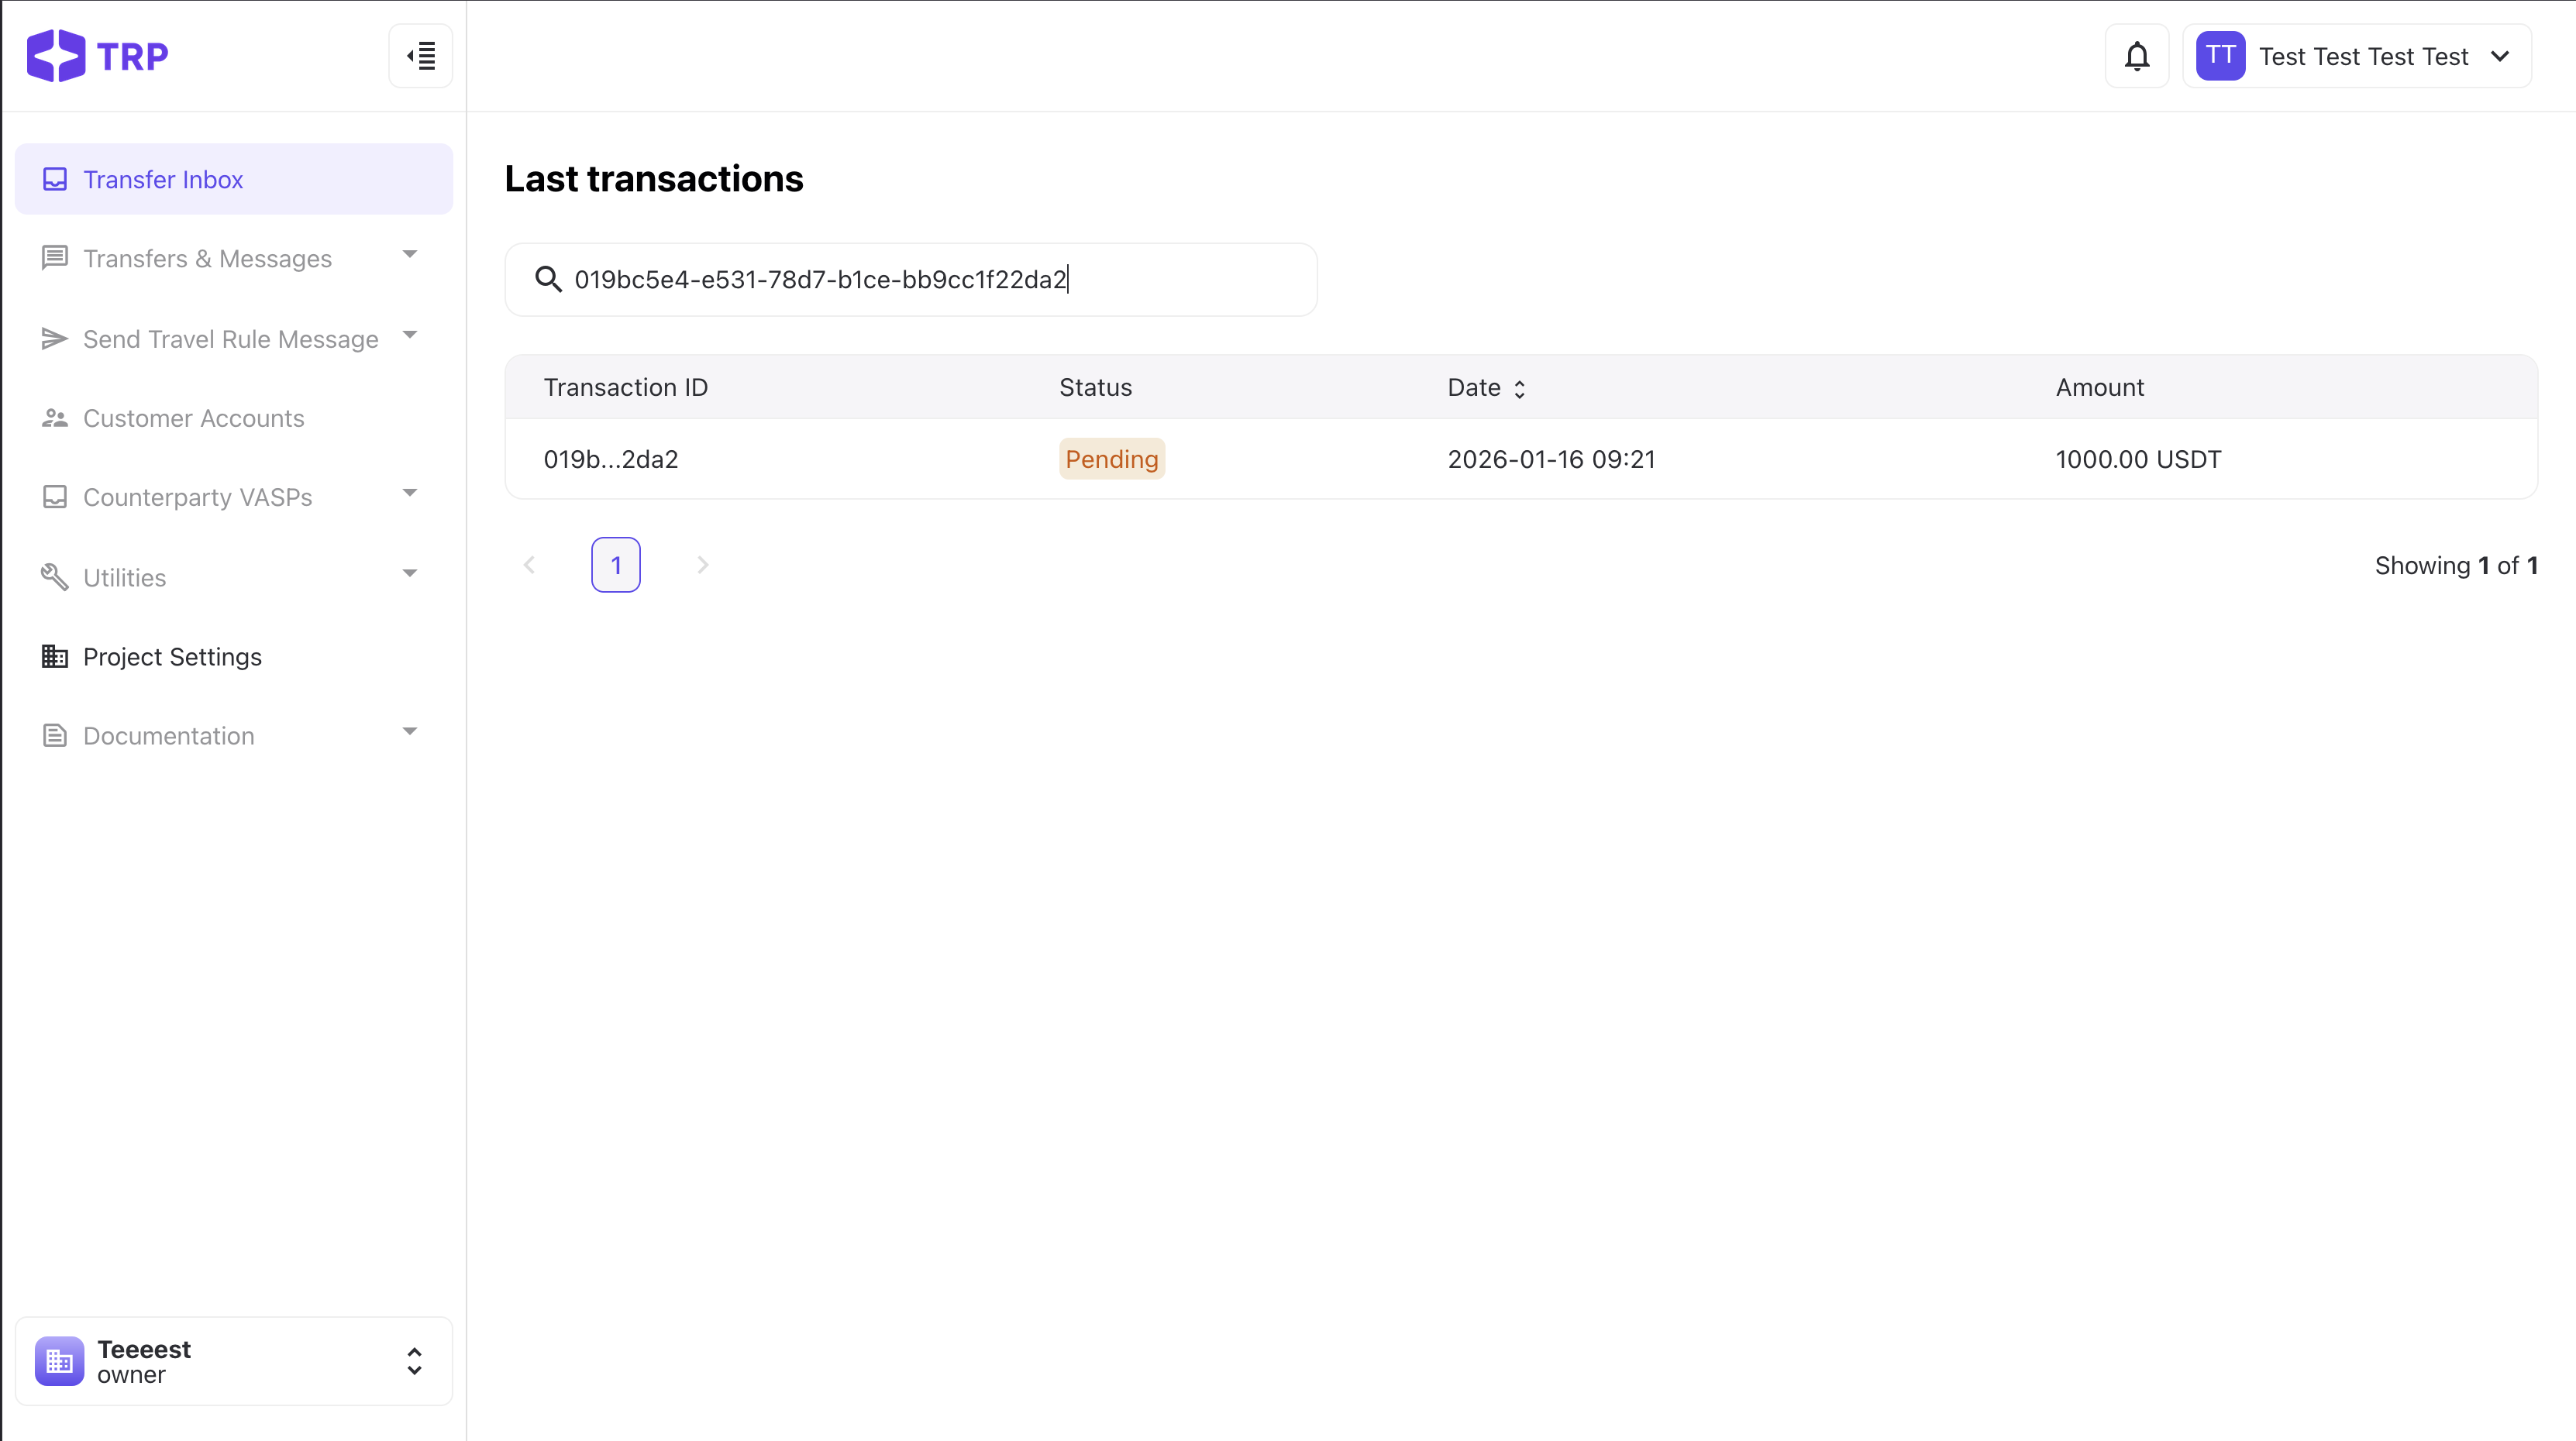
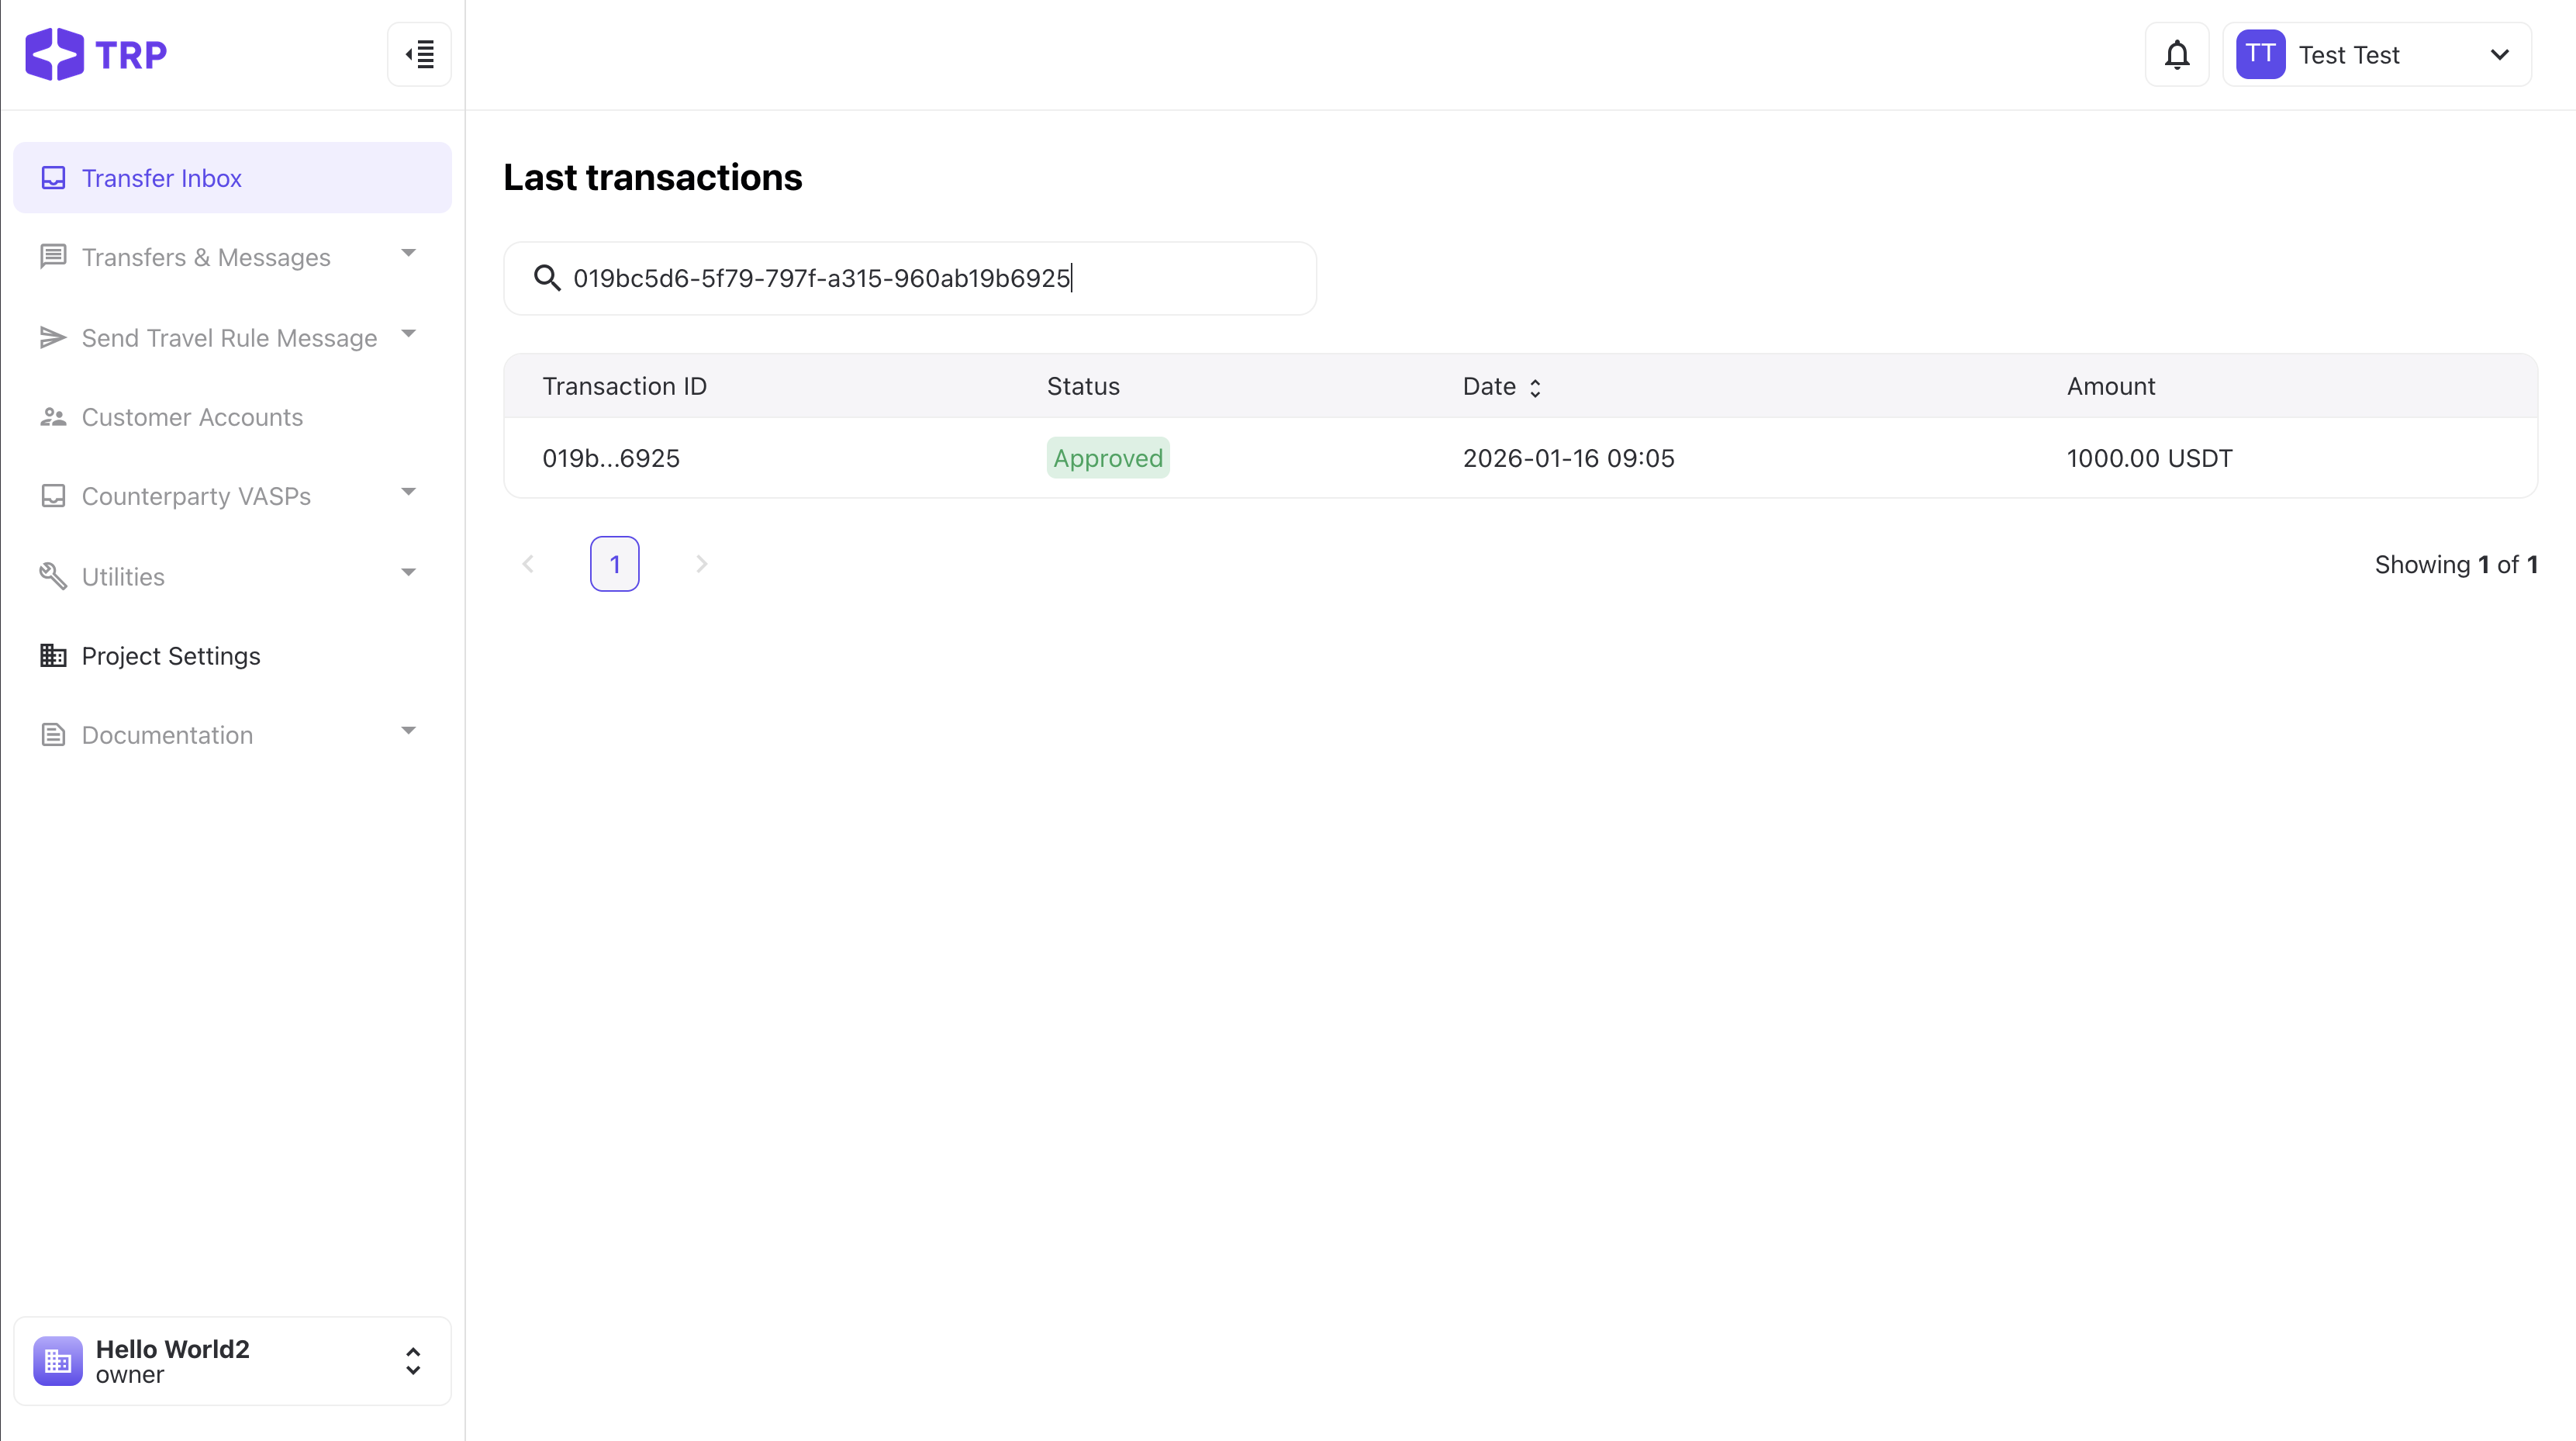
Step 7. Find the Transfer in the Inbox
Copy the transaction ID and open the Transfer Inbox in the application.
👉 Go to: Dashboard
Search for the transaction using the transaction ID.
Result: You will see the created transfer in the Transfer Inbox.
This flow demonstrates how one user generates a Travel Address and another user initiates a transfer using that address. The transaction will be visible to both users.
Step 1. Register the First User
Create the first user account.
👉 Go to: Dasboard
Result: First user account is created.
Step 2. Generate a Production API Key (User 1)
Create a production API key with a future expiration date for the first user.
Result: Production API Key for User 1.
Step 3. Generate an Access Token (User 1)
Authorize using the API key.
👉 Go to: API documentation
Result: Access token for User 1.
Step 4. Configure the Access Token (User 1)
Add the access token to API request authorization settings.
Result: User 1 can now make authenticated API calls.
Step 5. Generate a Travel Address (User 1)
Call the Travel Address generation endpoint.
👉 Go to: API documentation
Result: A Travel Address generated by User 1.
Step 6. Register or Log In as a Second User
Either:
- Register a new account, or
- Log in using an existing different user
👉 Go to: Dasboard
Result: Second user account is available.
Step 7. Generate a Production API Key (User 2)
Create a production API key with a future expiration date for the second user.
Result: Production API Key for User 2.
Step 8. Generate an Access Token (User 2)
Authorize User 2 using their API key.
👉 Go to: API documentation
Result: Access token for User 2.
Step 9. Create a Transfer Using the Travel Address
Copy the Travel Address generated by User 1 and create a transfer as User 2.
👉 Go to: API documentation
While sending the request:
- Provide the Travel Address generated by User 1
- Specify a callback URL generated on Webhook
Result: The response will contain the transaction ID of the created transfer.
Step 10. Verify the Transfer for Both Users
Copy the transaction ID and open the Transfer Inbox.
👉 Go to: Dashboard
Check the transaction:
- Under User 1
- Under User 2
Result: The same transaction is visible in the Transfer Inbox for both users.